Friday, September 16, 2011

Crispy Microwave Potato Chips

I'm a snacker. I snack. I snack too much, to be completely honest. My favorite snacks are salty: chips, popcorn, pretzels. This isn't good for many reasons, not least of which is the oil & other stuff in potato chips (snack of the champions).

I'm sure many of you have seen the recipe(s) for microwave potato chips. I've seen it a few different places over the past year or two. When I saw it the first time I was skeptical, but decided to give it a try. The recipe I followed was simple enough: slice the potato very thin (with a mandoline/slicer if possible), blot, spray with cooking spray or oil, arrange on a glass plate or on parchment paper, microwave for 3 minutes, turn the chips over & microwave again. It produced chips, but they were not quite "right" (to my discerning snack palate --ha!). They were crunchy but not crispy, you know? And sometimes they didn't cook evenly so there would be a limp bit in the middle of crunchy.

Fast forward to 2 days ago. I suddenly wanted to try making them again. I get these bizarre brain jumps in the middle of my work day and then spend the rest of the day mulling it over, problem solving or designing a plan while I work (and sometimes it leads me to wasting time online but we'll keep that our little secret). So Wednesday, I wanted to try microwave potato chips again, so I googled it because I couldn't remember all the instructions. This time I came across this plastic ring with slots cut into it. It was a microwave chip maker! This (of course) led me into a google sink hole where I spent (mumble) minutes looking for a place where I could get one in Canada.

Normally I have really excellent Google-Fu but this time I just couldn't find anywhere to get one locally (or on this side of the border). So I sadfaced and carried on with my work.

This is when the brain jump kicked in in earnest. Suddenly I realized I could hack the chip maker at home! Using recycled cardboard! (this is the point where anyone I've told about this starts laughing. So go ahead, I'll wait).

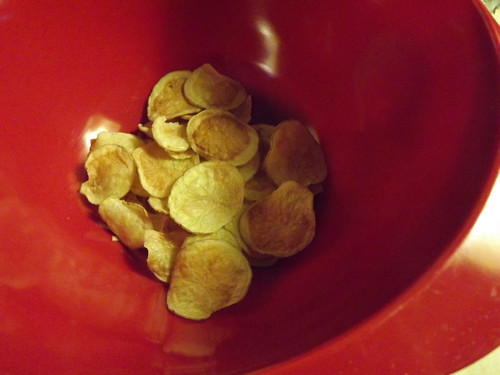
Of course, the minute I got home I had the scissors out and was constructing my chip maker. I tried a small batch, microwaved for 2 1/2 minutes, checked the chips, then another 2 1/2 minutes. When I took the chips out, they looked like "real" potato chips. I tested one and promptly wished someone was there with me so I could brag/gush about my experiment. The chip was crispy!!! Not crunchy, not slightly stiffened, crispy. Success!! I tweaked the process slightly (and made a second chip rack) and proceeded to make a fairly significant amount of chips in a short time. No oil! No additives! Just potatoes and salt.

Here's what I did. If you try this please let me know what you think! Or if you have any suggestions to improve it.

**Of course, please use caution when cutting the potatoes, when using the microwave etc. Don't walk away and leave it running for an hour or something. I think short bursts is probably the best way to go with timing the microwave.
DSCF0385

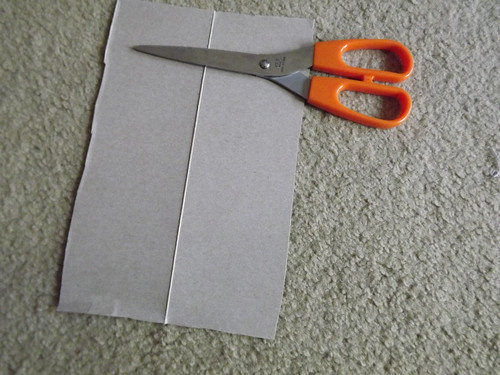
Cut a kleenex box or other piece of cardboard to the size you want. I used the length of the box and the height and then cut down the bottom to match the height. It's approximately 9"x6". You may need to measure inside your microwave to see what will fit.
DSCF0386

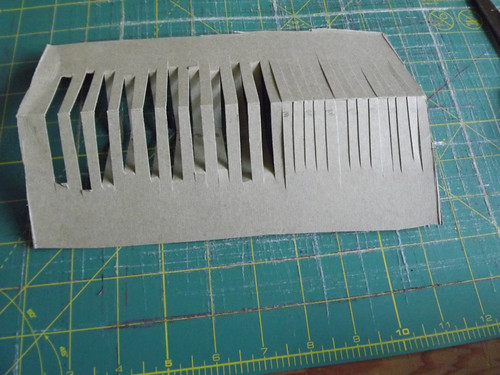
For the first rack I carefully measured 1/4" spacing and cut on the lines. My cutting was a touch wonky as you can see. The second one I just eyeballed and they both work just as good. One suggestion would be to not get too close to the long edge when cutting as this will make the slot too wide. I had potato slices fall out.

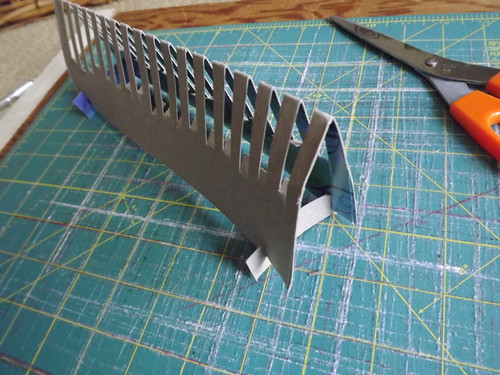
When you have your slits cut, cut away every other flap to create spaces for your potato slices.
DSCF0389

I ended up adding a piece to each end on the bottom to hold the shape and to stabilize it. Depending on how well your piece stands on its own you may want to cut these as well.
DSCF0390

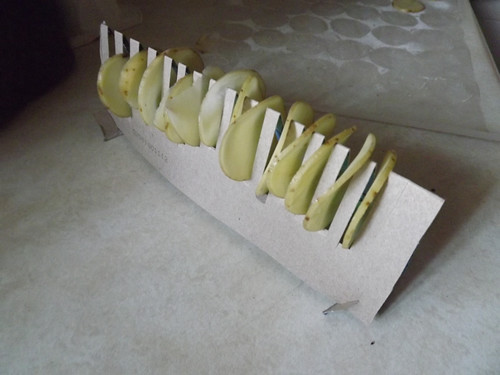
Slice your potato as thin as possible. Blot on paper towels. I added salt before cooking--just sprinkled it on while they were blotting. Load your chip rack and carefully transfer to the microwave. (I had to reload at least 3 times out of the 6 or so batches I made)
DSCF0391

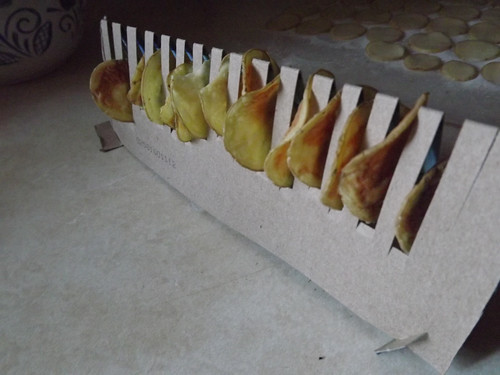
After 5 minutes in total. Mmmm. Chips.

I found that some of them were quicker than others but the most it took was about 6 1/2 minutes. My microwave isn't the most powerful one around so you may have different results.
DSCF0393

I'm not usually a fan of flavored chips (prefer plain) but I was thinking you could probably try those popcorn seasonings if you wanted to make flavored chips. Or just herbs or spices. I'd be interested in any seasoning ideas anyone has. I'm sure I'll be making the next batch tonight!

Tuesday, September 06, 2011

Hoodie!

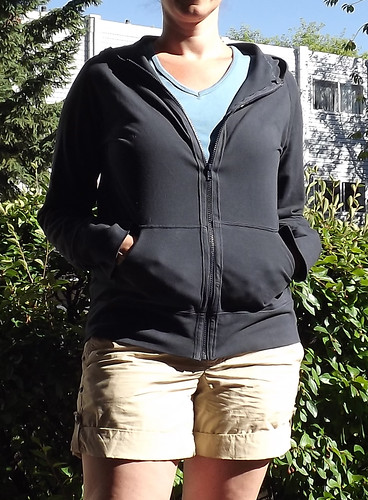
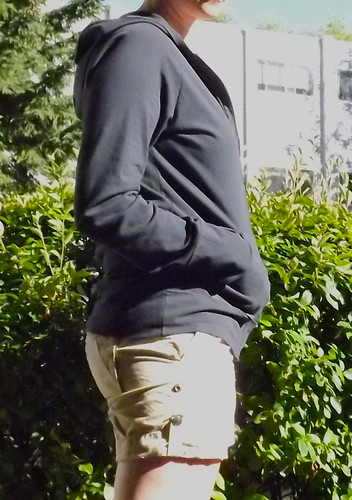
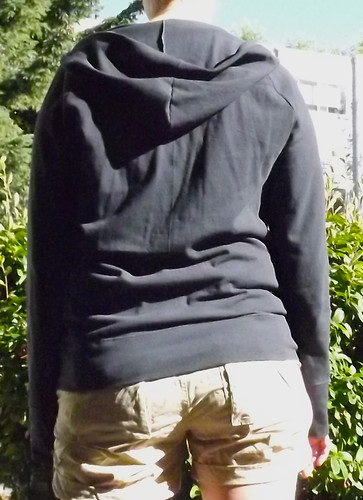
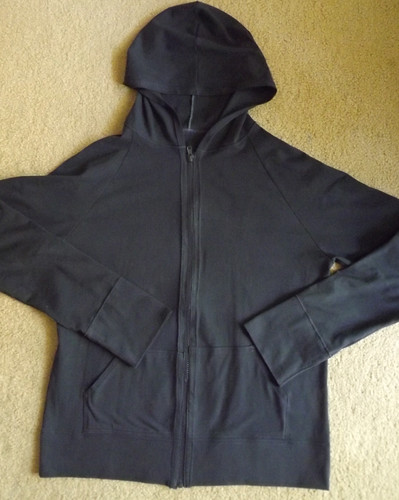
Just as I was astonished that I was able to make pants (PANTS!!!) earlier this summer, I am astonished I was able to successfully make a hoodie. Not just that I made a hoodie but that I immediately started planning the next hoodie I would make when I snipped the last thread on the first.

DSCF0370 


I used the pattern in Sew U Home Stretch and some heavier weight cotton knit. I thought it would take a long time to sew but, after I had the pattern pieces prepped it only took about 2 hours! I don't know why I thought it would take longer than that...

DSCF0371

(my camera blew out most of the shots and no amount of trying to fix it seemed to really help. oops) The dark navy is one of my favorite neutrals. I love the fabric, it's the perfect weight for fall/spring and for in my office where the temperatures swing between Arctic and Equatorial at least twice an hour.

DSCF0372

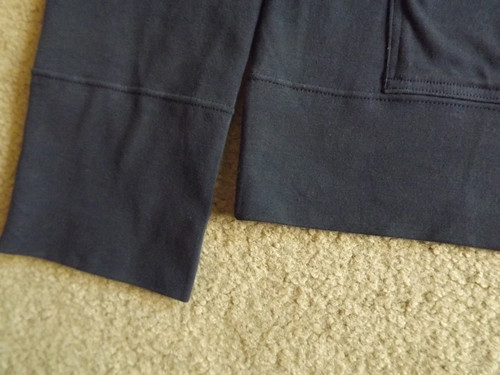
I made the size Large and it fits perfectly. I didn't have ribbing that matches the main fabric so I extended the pattern pieces to make a deep hem and cuff. All edges are serged (whee!!!) and I managed to successfully use a twin needle for finishing.

DSCF0378

DSCF0374

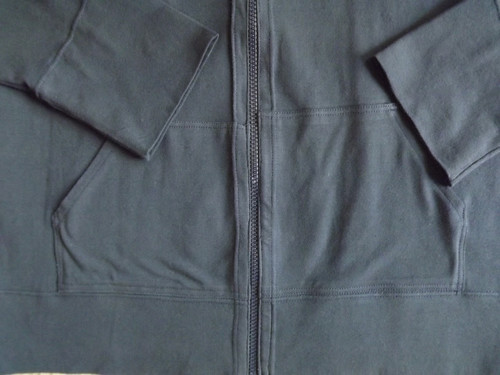
My one major d'oh appeared when I went to sew in the zipper. I somehow made one pocket a good half inch taller than the other. Oops!
DSCF0376

Now, if you just take the evidence of this often neglected blog, I haven't been doing much making this summer. On the contrary, I just haven't been finishing much this summer. Making and finishing this hoodie in one afternoon has really kicked my "must finish stuff" drive into gear. Either that or I just need to start documenting my WIPs. I'll try to get on one of those soon.

Sunday, July 17, 2011

Weekend Sewing: D'oh! Meh. WooHoo!

This weekend I was sewing, as I often am, and had a project bomb, one that's wearable but uninspiring, and one that I'm really happy with.

D'OH

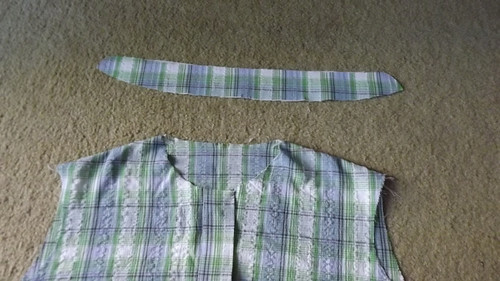
This is actually the second attempt to use this fabric. I salvaged enough from the first failure to cut the pieces for a button down shirt. I used the pattern from Sew U. I had success with it the first time I used it so I merrily was on my way cutting the pieces and getting ready to sew.

DSCF0248

When I got to the collar stand I ran into a glitch. I don't know if I cut the body pieces too big or the collar & stand too small but either way, the collar stand & collar are at least 2 inches too small for the neck opening.

D'oh.

Oh, and did I mention I used every last square centimetre of the fabric for the pieces I cut out?

I think I can salvage it by completing the shirt without a collar. I'm thinking more like a U-neck and just hem the opening. (hem? that's not the right word for the neck opening) For the time being it's in time out. If I can't salvage it the fabric will be used for something else along the way. I really like the plaid.

Meh.

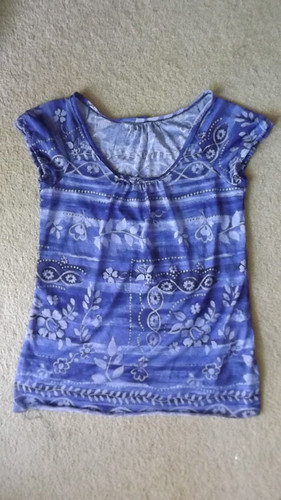
When I realized the first shirt was a d'oh I pulled out a light weight knit print I had found in the clearance section of Fabricland a few weeks ago. I decided to go with the t-shirt pattern I had success with earlier this summer and got going. It's wearable but there's something I'm not totally thrilled with.

DSCF0252

I haven't finished the hem and I want to re-do the elastic in the sleeves. The fabric was really slippery for some reason and I found myself frustrated with it. It's a really nice weight though and I think I'll finish it up tonight or tomorrow.

WooHoo!

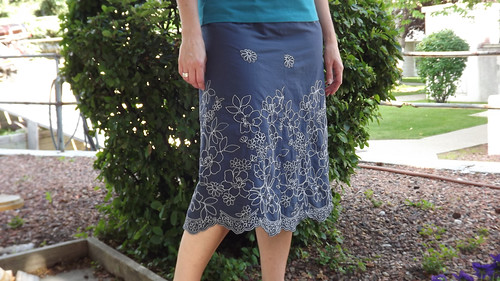
Another skirt! This is exactly what I pictured when I found this lightweight cotton in Fabricland a couple of months ago. It had this beautiful embroidered edge and I immediately saw a skirt.

DSCF0250

I drafted a simple 4 panel skirt using math that even I can do. I've used this technique before to make a 6 panel skirt. Please to enjoy my fancy diagram created in my word program.


There are many tutorials online, some of them even have pictures AND descriptions and weren't created in a word program that has no business doing illustrations!

I lined the skirt with the un-embroidered half of the fabric width. The skirt was a bit thin and I didn't want to bother with a slip when I wear it.

I'm fairly proud of the zipper as it's enclosed between the skirt and lining. It's not terribly neatly sewn mind you, but it is enclosed between the skirt and lining and that is the accomplishment we are focusing on.

I still somehow managed to make the waist too big. I seem to do this with any skirt that doesn't have an elastic waist. Better than too small but it sits a bit too low. Overall I'm very pleased with how it turned out.

You may have noticed the sudden obsession with skirt making (I have another one I haven't shown you yet). My office-mate & I had challenged ourselves to wear a skirt at least once a week for the summer. It's a little out of the ordinary for me to wear skirts but I'm finding that I quite like them for work in the summer. I realize this is old news to most of you but I'm generally a jeans & t-shirt kinda girl.

************

I have to travel for work this week. I normally don't leave my office but I need to go to Houston to train someone in our office there to do my job. Well, not my job but how to do the job that I do. You know what I'm trying to say. I'm glad for the change but a bit nervous about going. I'm pretty much a hermit lately and I'm always nervous meeting new people.

Also, I live in Calgary. It was 26 Celsius (79F) today and people were talking about how sweltering hot it is. I have lived in hot/humid before but to go from not-humid/barely-hot to really hot/extremely humid in one day will be... uh... challenging I'm sure. The hotel has a pool, where I hope to spend most of my time while not in the office. (Houston, you are welcome in advance for the visual of my awesome shorts-tan)

I'll only be there for 3 days so any amount of low-grade worrying is seriously unnecessary but there you have it. I won't be able to sew (obviously) so I'm planning to take a sock to knit. I'm travelling with a coworker and I'm sure she would be mortified if I had anything larger to work on. I expect I'll be reading a lot on the flight/trip also. Anyone have any good book recommendations? I've been on a spy-novel kind of kick but would be open to suggestions if you've read something really engrossing.

Wow, long post. Okay so hope you all had a great weekend. Oh, and thank you for your comments on the last couple of posts. (I haven't fully worked out how to reply to people yet and sometimes I can't find an email address when people comment from a different blogging platform.) It really is encouraging.

Sunday, July 10, 2011

Swing Skirt

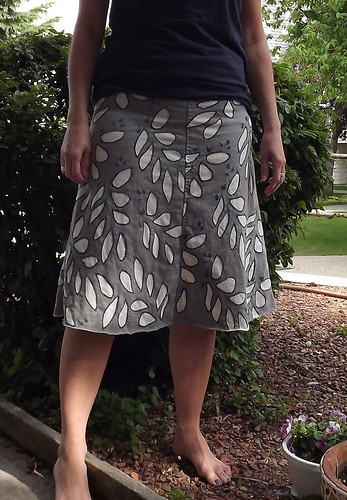
I'm a little late on the Alabama Stitch Book bandwagon. This skirt was making the blog rounds a couple of years ago (I think) and I loved it then but didn't get the book until this spring. I love the style of Alabama Chanin's designs and this skirt is no exception.

Swing skirt from Alabama Stitch Book

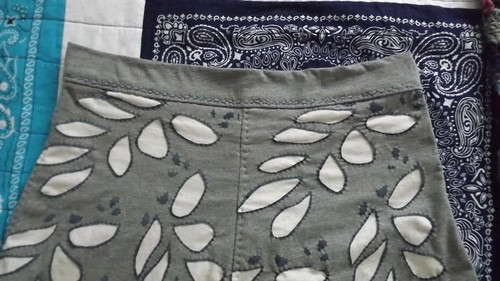
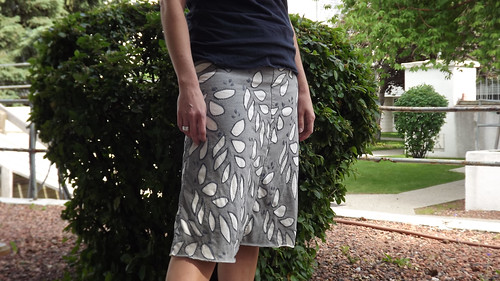
The skirt (if you are unfamiliar with the project having just been introduced to the internet or something) is made by stencilling the design and then using reverse applique, entirely by hand. I was nervous about it. All that stitching was relaxing and quite satisfying, but what if it didn't fit! It took weeks -- mostly because I would work on it for a bit and then leave it for a few days.

I'm happy to say it fits perfectly. Imagine here my enormous sigh of relief when I tried it on last night!

Swing skirt from Alabama Stitch Book

I used fabric from 2 different jersey sheet sets (my go-to for inexpensive t-shirt material) and acrylic paint mixed with a fabric medium for the stencil. I may have over-done it with how much I stencilled. I like how it looked but it took a long time to stitch. Next time (oh yes, I'm planning another) I'll do much less stencilling.

At first I wasn't sure how I'd feel about hand-stitching the skirt together. It didn't seem very sturdy before I tried it. I was thinking I would use the serger to construct the skirt but in the end decided to hand-stitch it after all. It seemed right to complete it by hand after putting in all that time. I'm really surprised and pleased with how sturdy it feels.

Waistband - Swing skirt from Alabama Stitch Book

The pattern calls for using fold-over elastic (FOE) for the waistband but I couldn't find any and was to impatient to order it. I ended up using a strip of matching jersey to make a waistband. I think I should have made the waistband an inch smaller but it will be fine for now. If it stretches out I think I can put in some elastic.

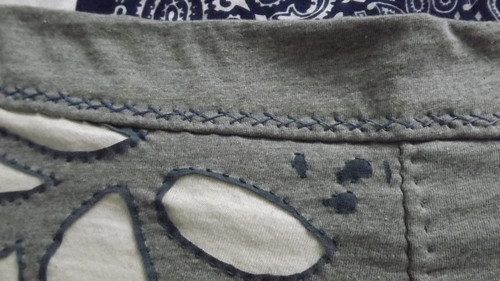
herringbone stitch - Swing skirt from Alabama Stitch Book

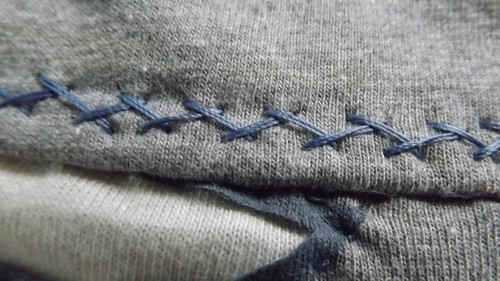
I played around with different stitches to attach the waistband. The last thing I wanted, after spending all this time making the skirt, was to have the waistband stitches snap when I wore it! I ended up going with this herringbone stitch I found online (I can't remember where, sorry). It is really stretchy and was relatively easy to stitch. I stitched the waistband to the skirt and then did another round of herringbone to tack the seam to the waistband.

Swing skirt from Alabama Stitch Book

This is easily the most comfortable piece of clothing I've ever made and the most time-consuming. I love how it's casual and special at the same time - if I may pat myself on the back a bit!

Monday, July 04, 2011

Vintage Leather Jacket Bag

I keep forgetting to post projects I've completed in the last few months. I have another one for you today, one of my favorites.

I was rolling this idea in my mind for almost a year, since I made my first leather jacket bag. About a month ago it clicked in my brain and I stopped by Value Village on my way home from work. (Pro Tip: Pronounce Value Village with a bad French accent so you're fancy) I found the perfect 70's jacket and made my way home. And forgot to take a before picture, of course. d'oh.

DSCF0125

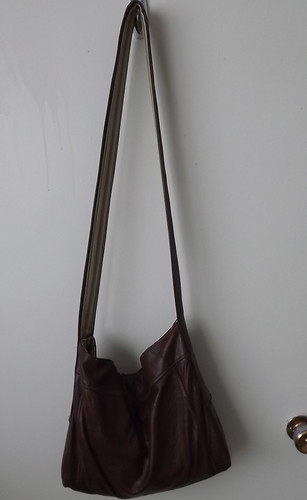
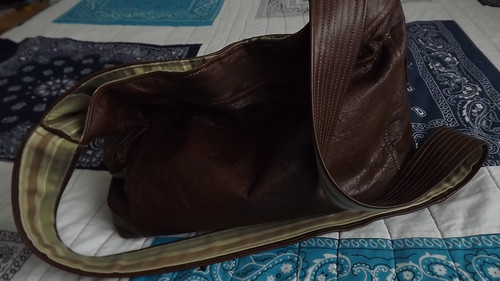
I used the back of the jacket for the body of the bag. I ended up adding a band around the top to give the bag more depth.

DSCF0220

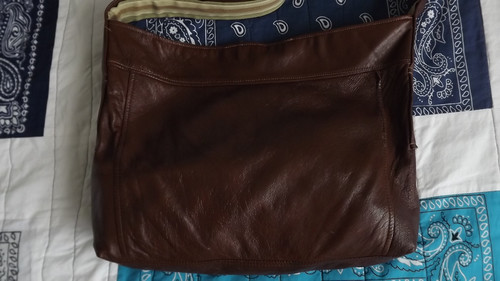
The jacket had a band across the back at the waist and vertical seams along the whole length of the back. The waistband was exactly the width I wanted for the bottom and the vertical seams add detail to the bag.

DSCF0221

It's nice and slouchy without being too floppy. If that makes any sense. I made the strap long so the bag can be worn cross body, which I love. I am far too clumsy to wear a bag on my shoulder while shopping for groceries. I end up knocking stuff off shelves or dropping my bag. You think I'm exaggerating but... yeah no, I'm that clumsy. Ask my office mate.

DSCF0222

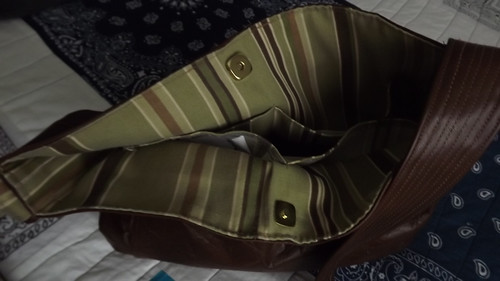
It's lined with some random stripey fabric from my stash. I used a magnetic snap to hold it closed and added some pockets for functionality. It has a great "Dad's old leather jacket" smell (and surprisingly no "gross Value Village" smell!) and has that creaky old leather jacket sound.

***********************************************

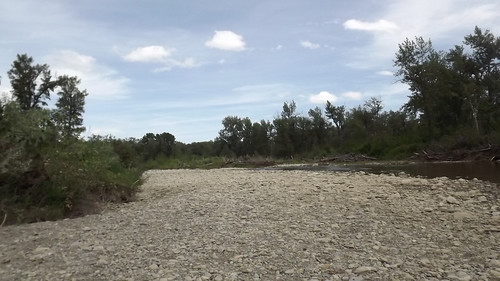
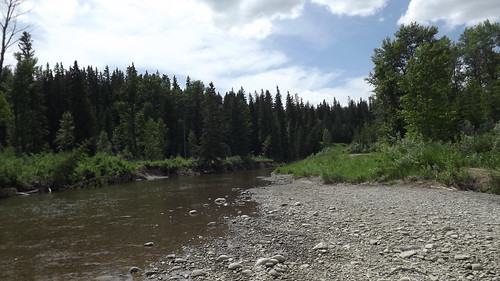
I took an extra day off today. (4 day weekend! woo!) After a couple of errands I headed down to Fish Creek Park for a walk and to sit by the creek to read.

I love that Calgary has these places within the city where not only can you not see the city but you can't even hear any traffic or anything.

DSCF0204

DSCF0215

DSCF0210

I didn't stay as long as I had planned, too much pollen & fluff from the trees. My allergies are bad this year and I was getting miserable. On my way walking back out to my car I nearly stepped on an 18" long garter snake (gah I just gave myself the willies thinking about it). I have a teeny tiny thing about snakes. I'm not scared of them but they just give me the creeps. This one was tiny and still icked me out. I'm sure I scared it more than it creeped me out though. I swear it jumped when it saw me. (which just gave me goosebumps in my hair) (I'm sure you're *surprised* there are no pictures of the snake).

Wow got myself off on a diversion there.

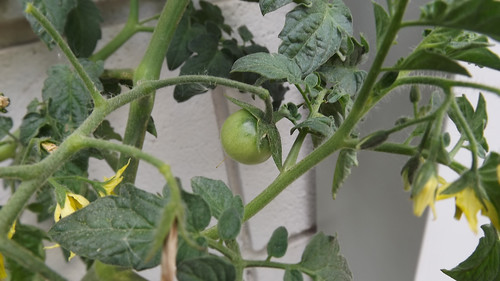
When I got home I had the best surprise though: One of my tomato plants has an actual real live tomato growing on it! woo! success (well, a harbinger of success).

DSCF0217

Last year I only had 2 tomatoes on 2 plants all summer. My strawberries are actually producing this year too so I'm really looking forward to those as well.

Happy 4th of July to any Americans out there (and belated Happy Canada Day! to my fellow Canucks).

Tuesday, June 28, 2011

PANTS!!!

I keep forgetting I have a new camera and consequently keep forgetting to post finished projects. D'oh. So, without further ado...

Oh, and, anyone visiting from a place where "pants" means something other than "trousers"... I'm referring to "trousers" here. Adjust your vocabulary accordingly for the duration. :)

PANTS!!! (the all-caps & triple exclamation mark is indicative of my excitement and disbelief over being able to make PANTS!!!)

First up:
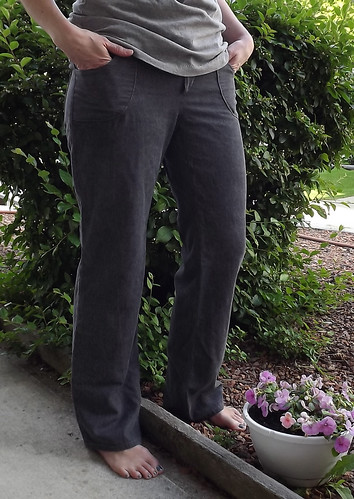
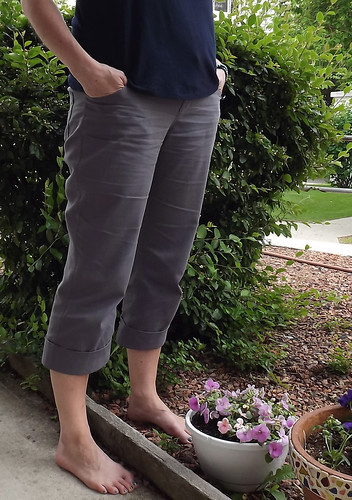
I decided to be smart (*cough*for once*cough*) and made a muslin of the pattern before I cut into my "good" fabric. I had just enough of a light weight denim from a thrifted duvet cover to make a pair of pants from the Sew U book.

Pants from Sew U

(I'm sure my neighbors wondered what I was doing standing in the shrub outside my apartment)

The original pattern had a quite wide flare at the bottom. I ended up taking them in 3 inches at the hem and angled up the leg. (my terminology here is noticeably lacking. What's the word for when you work the alteration into the original pattern line? brain empty)

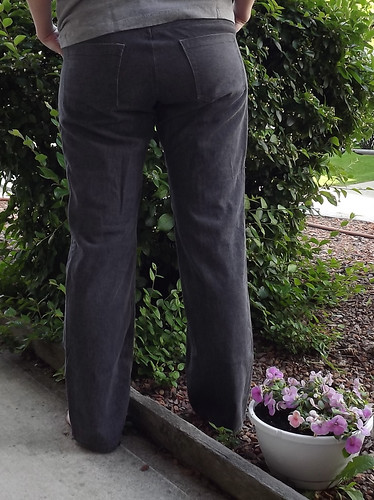
Pants from Sew U

I made the large size which fits me pretty much perfectly. The original pattern is a bit long from the waist to crotch but other than that they fit exactly how I wanted. I've worn these a few times and they haven't fallen apart nor have I felt like I was wearing "homemade" pants. (as opposed to "handmade" pants.)

On to the "good" fabric:

Pants from Sew U
sorry for the wrinkly photo. I mean photo of wrinkly pants. This was after wearing them all day

Changes I made from my muslin:
-made the pants capri length because I stupidly cut the fronts a full inch shorter than the backs as a design choice. I gave them 2 1/2 inch cuffs which are tacked down at the seams.
-shortened the waist to crotch length by 1 inch
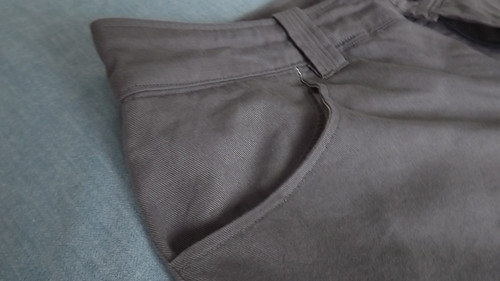
-changed the patch pockets to (again what's the word...?) inside pockets. These were an experiment as I didn't have a pattern for them. I'm happy with them but they aren't ideal. Lessons learned for next time

Front pocket - Pants from Sew U

Overall I'm so excited about having made both of these pairs of PANTS!!! and I definitely will be making more. I really like this pattern but I'd be interested in any pattern suggestions if you have them.

Tuesday, June 14, 2011

Finally a success!

My camera died a few weeks ago which is my latest excuse for the lapse in blogging... Finally got a new camera so I'll try get caught up and post stuff I've been making in the camera blackout.

I've been experimenting with making t-shirts ever since I got my new baby (serger) with varying success. They've technically been shirts and have fit mostly but nothing that I really wanted to wear. This past weekend I decided to try a different pattern. I picked up New Look 6807 and, with the help of a really rainy Saturday, I finally ended up with a shirt I wanted to wear.

Having not had great success to date I made a muslin using jersey from a t-shirt sheet. The pattern was easy to follow and I loved how it turned out.

DSCF0073

(about an hour after taking this picture I ended up splashing cooking oil (cold) on the shirt! d'oh. I need to try to get it out with dish soap or something)

The pattern has a split & tie at the top of the back but I didn't want that so I cut the back on the fold (removing 5/8" from the pattern piece for the seam allowance). I loved how it fit and decided to try with my "real" fabric.

DSCF0098

(more about the pants later)(I made PANTS!!!)(need to get better pictures of the PANTS!!!)(I think of them in all caps with 3 exclamation marks because I can't believe I made PANTS!!! that I can wear. You understand)

Overall I love this shirt. My only quibble is that the neck is pretty wide and the tops of the sleeves slide down on my shoulders a bit. I think for my next attempt I'll gather the entire top of the back instead of just the 2 small spots where the pattern outlined.

Sunday, May 15, 2011

Ribbed open cardigan

I'm so excited with how this turned out! It's the first item of clothing I've made with knits (ribbing actually) that I will wear.

DSCF1002

(forgive the terrible quality of the photos. My camera has been on its last legs for a while.)

I altered the crew-neck t-shirt pattern from Sew U: The Home Stretch to copy a jersey cardigan I bought last winter.

It's not perfect, the sleeves are a bit too wide at the top and I'm not happy with my sewing in spots but BUT... it's a wearable garment. And it's almost exactly what I had pictured when I was working on it.

DSCF1003

I serged the seams (love my new baby!) and sewed the hems with a double needle on my regular machine to mimic coverlock. (I think that's the right terminology) I found the ribbing harder to work with than I expected as it pulled out of shape in places when I was cutting but didn't realize until I went to sew it up. I managed to work it out but lesson learned there.

DSCF1005
(the most accurate picture of the color)

I'm not a big fan of off white/white clothing for myself. I have a tendency to spill like a 2 year old with a plate of spaghetti. I am thinking about dyeing the cardigan but I'll see how I feel about it going forward. I have enough of this fabric left to make another one I think so maybe I'll dye the leftover instead.

Next up: the hoodie from Sew U and a pair of pants. I find it fascinating that the craft-center of my brain turns almost exclusively to sewing/fabric when spring comes around. Anyone else?

Friday, May 13, 2011

Wrist rest cover

So... Every day at work I get annoyed at the vinyl covered wrist cushion I have on my keyboard tray. The vinyl cracked at one point and was scratching my wrist so I covered the spot with electrical tape. Then the electrical tape started annoying me as much as the crack in the vinyl and... You see where this is going.

DSCF1008

(i also need to make a new ironing board cover it appears)

For weeks I wished I had a different cover on it. I finally had enough the other day and brought the wrist rests (hard to say) home.


Muuuuch better. The long rest is covered with scraps from a thrifted sheet so it's very smooth & soft to the touch. The mouse rest is covered with scraps from one of Amy Butler's (I think) prints -- I don't remember the line or anything. It was from a bag I made my friend (which, now that I think of it I'm not sure if I ever blogged - I'll have to see if I have any pictures).

Hope you all have a nice weekend. I think the spring/summer sewing bug has set in rather solidly so I imagine I'll end up sewing at least part of the time. Hopefully I'll have something to show for it at the end!

Wednesday, May 04, 2011

(nearly) Wordless Wednesday: Embroidery

this is (obviously) not the wordless part.

I keep seeing "Wordless Wednesday" posts on blogs I read/stalk and I love them. This morning it occured to me this might be a good way for me to post when I have pictures but nothing much to say about them. (am brilliant, no?) I'll see how frequently this happens but I kind of like the idea.

okay, after this is the wordless part.


*********************************************

DSCF1015

DSCF1014

Monday, May 02, 2011

My new baby

I took the day off today. I haven't had many extra days off over the past year so I wanted to make it worthwhile. So I slept in (slightly. woke up at 7:30 for no particular reason), cleaned out the closet of doom, cleaned up my patio area, went to vote and then did what I was really really excited about.

I went to the sewing machine store where I ended up talking to a really great salesperson who explained the machines (and didn't talk down to me! Refreshing! It's kind of sad that I've gotten so used to bad service, lack of interest, or condescension from sales people that I almost expect it. Is that just me?) It was so nice to talk to someone who knew what she was talking about and helped me figure out what I needed that fit my budget. Yay!

Meet my new baby:

DSCF1002

I brought her home, set her up (by which I mean I took her out of the box and plugged her in. She was pre-threaded!) and started to serge a big pile of scraps - so much fun!

After about a half hour of scrap-serging I started thinking that I would like to try making a t-shirt. I pulled out Wendy Mullin's Sew U Home Stretch and started flipping through it. I thought maybe I should wait a bit until I feel more comfortable with the machine, but then I realized: I feel more comfortable than I expected already and what better way to learn to do something than by just doing it? (well, other than brain surgery or something like that).

So I dug out a t-shirt sheet I had in my stash (I've bought a few sets of t-shirt sheets when I find them on sale. The fabric is probably not the finest quality but it's a LOT of yardage for not a lot of cash). An hour and a half later (with pauses to get supper started) I had a very simple roll-edged t-shirt.

DSCF1004

I'm not going to model it for you, it's not super flattering. But it does fit and it was excellent practice. I think I'll dye it and probably end up just wearing it around home or maybe as a sleep shirt.

DSCF1006

The seams are so fascinating to me. I just cant get over how well this machine works. I kept thinking "is this really how easy it is? Am I really almost done making this?" Next time I'm going to attempt a more complicated construction with a hem & neck band.

Thank you ALL for your advice on the machine. I wrote a list of features based on your comments and brought it with me to the store. It made me feel just a little bit more prepared and I think helped make this such a positive buying experience for me. I chose the Janome for several reasons, not the least of which was the fact that it was about half the price of the cheapest Babylock (which was my original first choice).

Now I need to find good sources for knits. I can see myself making a lot of t-shirts in the future. I wear them a lot (every day) and would love to fine-tune and tweak the pattern I used. I don't know if there are any places locally where I could find good knits for not a lot of cash. Fabricland has some stock but it's never very appealing. Anyone local have any ideas? Or online (preferably Canadian so I don't have to deal with customs fees)?

Sunday, April 24, 2011

Happy Easter

DSCF1006

I hope you're all having a nice Easter weekend. I had a good weekend in spite of a cold that I thought for sure I had avoided. It was really bad Friday but by Saturday it was just a cough and I was fine for Easter dinner with my brother, his wife & kids and his wife's family. I love those guys (all, the in-law & all) so it was a really nice day for me.

I made the little bunnies above for my nephews & niece. I found the pattern here (The printable pdf is for a pre-printed piece that you can iron onto fabric. I just used it for the pattern outline.) I used some fuzzy fleece from store-bought fleece blankets for the ones at the top.


I first had made two bunnies for my friend's daughters out of quilting cotton. I was going to do this for my nephews & niece but I didn't have any *ehem*manly*ehem* cotton to use for the boys' bunnies, hence the fuzzy fleece.

The bunnies (and the chocolate and other goodies) were a huge hit, and, best of all, were super simple to make. Just a small amount of fabric, some stuffing and about 20 minutes (trace, cut, sew, stuff, stitch up, done).

*****************************

Thanks for all the comments & great serger advice. I plan to start looking/testing this week and will definitely let you all know what I get and when.

Sunday, April 17, 2011

Getting back up on the horse.

Has it really been 4 months since I've posted? I thought it was only a couple. Hmm.

So... It's been a while. I've been composing blog posts in my head for weeks, well, probably for months actually, but just never posted. Some things happened and I kind of felt knocked around for a while and then it just got to be one of those things where the longer you don't do something the harder it is to just DO it. So here it is. Nothing spectacular, nothing earth shaking, just getting back up on the horse and diving in. Probably not while on the horse. (Although, remember that movie? About the diving horse? Did I dream that? Too lazy to IMDB right now.)

I'll do this in list form if that's okay with you. A lot of this is just rambling or life-catch-up. There will be pictures later on so you can skip ahead if you want.

1. Christmas was quiet and kind of strange this past year (yes I'm going back that far. Sorry). I didn't have any family nearby and The Boy was only here for a couple of days over Christmas. I've spent Christmases away from family before but that was when I was overseas. This was very strange for me. I was able to Skype with one brother & his family on Christmas Eve which was pretty much the highlight.

2. In January I had to have a "procedure" to try to find some answers for stomach pains & related issues I had all last winter (that would be 09/10. It took 10 months to get a specialist appointment and then another 3 months to get the appointment for the "procedure"). I call it a "procedure" because I didn't really want to think about what it really was. It wasn't anything serious and it wasn't that big a deal. They didn't find anything but the pain is nowhere near as bad as it had been so... I'll call that a win.

3. In February The Boy ended our 4+ year relationship. I tried to figure out a different way to write that but there it is. That's what happened. It wasn't a total surprise, if I'm being 100% honest but it wasn't what I wanted. There was no big fight or drama, nothing that would cause any hatred or anything. I'm okay (now) and strangely he meant it when he said he wants us to remain friends. I still see him every couple of weeks and we text/email a few times a week. So there's that.

(For anyone who's ever read this blog and thought I meant a son when I wrote "The Boy", sorry for the confusion. Definitely not my son. I don't have any kids (the Boy would add "that you know of" which has been his running joke with me for 6 years)(sigh). )

(I didn't set out to write a month-by-month account but I guess that's what I ended up doing)

4. I have been knitting/sewing/making stuff. I just haven't been taking many pictures. Let's blame the Northern Hemisphere/Winter for part of it, my dying camera for part of it and my lack of focus and near inability to actually finish anything for part of it.

BUT I did take a few pictures! And one of them is something that is finished! And I'll post them now! As a reward! for making it this far in this long boring post! Exclamation mark!

First: In progress knitting:

DSCF1002

Pattern: Cerisara by Bonne Marie Burns
Yarn: Sirdar Breeze

We finally had some warm weather in March* and I got to wishing I had a light weight cotton cardigan for work. I have a couple of cotton cardigans that are in heavy worsted weight cotton blends but wanted something a bit lighter. Next thing I knew I had this downloaded and an actual swatch knitted. I know! a swatch! me!

DSCF1004

I think I can probably have this finished by the time it warms up again. If it ever warms up again.**

Second: In progress Embroidery (gasp I know! Embroidery! Me!)

DSCF1003

I'm just gonna take a minute to toot my own horn here***. I'm pretty sure this is the first time I've ever done any embroidery beyond a running stitch or something for a doll face. I've had these printed pillowcases in my "make this someday" pile for about a year (i think. a long time anyway) and kept imagining that one day I'd find the courage to try learning embroidery. Turns out the easiest way to learn it is to actually DO it (as opposed to leaving all the supplies in a box).

Thanks to numerous online sources and inspired by Wild Olive's focus on beginner embroidery right now, I was inspired this morning. I'm 99% sure I'm not doing it all correctly but, as I always tell new knitters, it's embroidery and I like it so it's right.

DSCF1007

I have a lot more to do (and then a whole 2nd pillowcase) but I'm really enjoying it. Who knew embroidery was so relaxing?**** I had such a nice quiet morning just stitching away.

Third: Ruby Lou doll

Ruby Lou

Pattern: Ruby Lou from Sew Much Ado.
Materials: stash. All stash.

I love love love how this little doll turned out. I think there will be at least 2 more of these in my future and maybe more after that. The pattern is well done and the finished doll is just so cute. This little one hasn't made it to her new home yet but will shortly. I hope my niece likes her.

5. I heard on Friday that our bonuses for 2010 were approved (i won't get into that bit of stress*****). I have plans for most of the bonus to go into savings BUT I decided to treat myself to a serger. I've wanted one for years and just didn't feel like I could justify it. I know I would get lots of use from it though so it's time.

So I'd like to know from you, dear patient and wonderful reader (you look pretty today by the way), if you have a serger or any advice and/or recommendations. I don't know what I should be looking for or what I really would need or just like to have. I want to make t-shirts and stuff but I know there are many other uses beyond just sewing stretch material. I don't know for sure what my budget will be but I'll do some research and if you have recommendations it will help me narrow things down.

Whew! You made it! Congratulations. That was a long post full of random bits and pieces. I won't make any promises but I really do want to get into a habit of posting more regularly.

And now I think I need to test one of the cookies I made today. For safety reasons of course.


*the warm weather was really nice. I think it got up to 20C at one point.
**since the time of the warm weather we've had over 50cm of snow. That's 19 inches. I'm not exaggerating. We had 20+cm in 24 hours a few weekends ago and then another 22+/-cm on Wednesday. There have been numerous other days with accumulations over 10cm. I'm ready to move to a warmer/less snow-prone climate. Anyone need a housesitter/roommate in the deep south?
***"toot my own horn"? what am I, 80?
****who knew? uh, probably anyone who has ever tried it. Rosie Grier knew.
*****work will be 90% easier after Monday because Monday is Wen-Shu****** comes back from maternity leave day! Happy Dance! I baked these cookies to celebrate tomorrow
******Wen-Shu, you may recall, is my dear friend/office-mate/only-other-person-who-knows-how-to-do-my-job who was on maternity leave the past year. So for a year I have had no coverage, no consistent help when I was extremely busy, no one to cover so I could take a vacation... etc. You get the picture. So, I'm beyond excited that she'll be back tomorrow