I don't know if it's a product of my upbringing, or just a weird personality thing, but I feel guilty if I'm not doing something that feels worthwhile during the day on weekends or time off. Like I should be using that time for something IMPORTANT (like what, I have no idea). "Just knitting" doesn't cut it mentally. (Though, oddly, sewing seems to be okay. Brain? weird.) "Just knitting" feels like being lazy. I've been struggling with this a lot while on my forced time off (otherwise known as being unemployed).
I made myself a schedule of sorts, so I could feel like I've accomplished something every day. I spend an hour or two scanning job boards & applying for anything that looks interesting (or, in the absence of "interesting" I apply for anything I'm qualified for). I made a list of chores to do, the things I need to do but keep putting off and try to get at least one of those done a day or work towards one being completed. I do at least 30 - 40 minutes of exercise every day. I make sure the kitchen is tidy & dishes are done. I put away whatever I had out in the living room. I put away my clothes.
After I've done everything I possibly could consider "work" my brain will allow me to knit in peace.
This past weekend I spent about 20 minutes searching for my US7 16" circulars. I knew they were probably involved in some abandoned project, but didn't know where. "Organize WIPs" was on my chores list so I decided to take that task on. I made myself a list as I went and sorted and organized what I had on the needles that I still wanted to finish (in the case of 2 modular blankets "on the needles" isn't accurate but I counted them).
I had 14 projects in active knitting status. FOURTEEN. ONE-FOUR. 14.
(In my defence, at least 3 of those are Christmas presents.)
At this point my brain made a sudden screeching change of direction. It has now allowed me to knit as "work" because completing these projects is important in a cleaning-house sort of way. Also, as several projects are Christmas presents, this is a worthwhile endeavour. Organizing the projects and making a list seemed to kick start a finishing mindset. I already checked 2 items off the list on Saturday and I'm about to bind off a third.
So, I'm working away on WIPs. I'm making every effort to finish what I'm working on before starting something new. The only exceptions to the "no starting anything" rule will be Christmas presents.
No-Guilt Knitting is kind of awesome.
Monday, November 05, 2012
Wednesday, October 24, 2012
Pieced Duvet Cover
2 days in a row! Wha?! I know!!
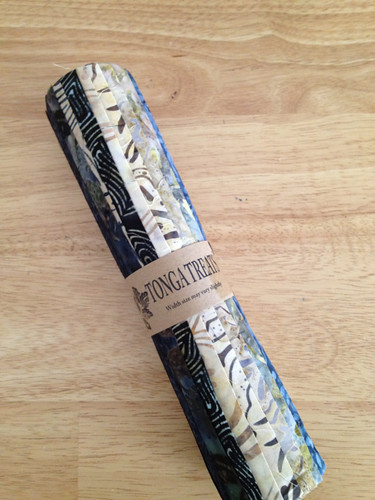
I bought this pack of precut 10x10 squares with a gift certificate from a local quilting store. It's Tonga Treat from Timeless Treasures in the "Coffee Cake" colorway (i think. I lost the label. oops)
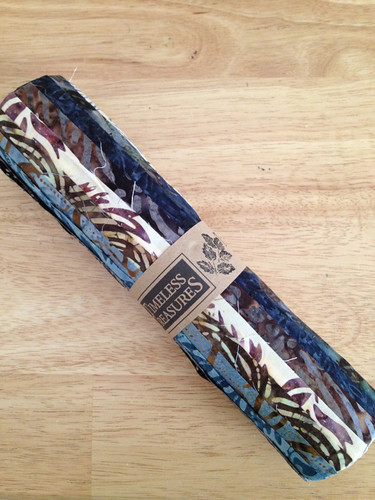
I spent a lot of time trying to figure out what to do with it. I didn't want to waste any of the fabric. I knew I wanted to do a duvet cover or something that would get a lot of use. I finally had a flash of inspiration one morning when I woke up (does that happen to other people?) and decided to do strips of pieced fabric alternating with strips of a solid.
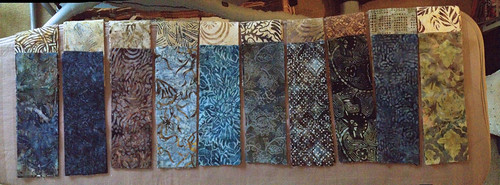
I cut each 10x10 piece into thirds and grouped the fabrics by lights & darks. I sewed these into strips, alternating light & dark. At first I planned to piece these on the seams but realized the individual cuts weren't all exactly the same length so, to save my sanity, I ended up offsetting the seams.
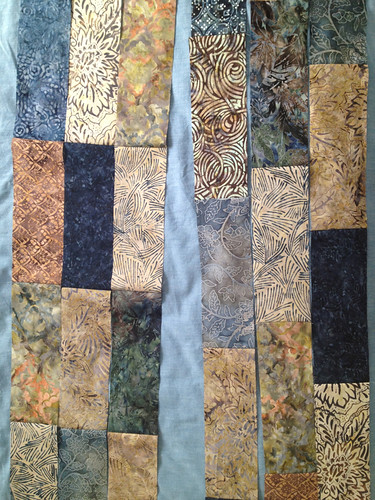
The solid is a sheet from Ikea (hence the matching pillow cases! woo!) and the back is made from another sheet. I really should have taken pictures of the process. I don't have much floor space in my apartment and sewing something this size is quite an operation. I needed to move my couch, plants, desk all as far out of the way as I could. My ironing board was in my kitchen, so that presented a challenge when my sewing time overlapped my need-to-eat something time.

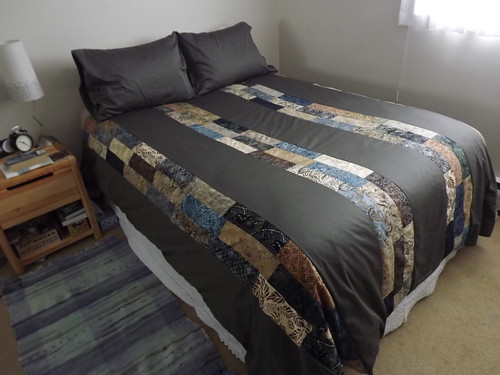
Overall, I'm pretty happy with it. I like the fact it's a departure from my usual color palette (but it still has my beloved blues represented). Nice to check this one off my to-make list.
I bought this pack of precut 10x10 squares with a gift certificate from a local quilting store. It's Tonga Treat from Timeless Treasures in the "Coffee Cake" colorway (i think. I lost the label. oops)
I spent a lot of time trying to figure out what to do with it. I didn't want to waste any of the fabric. I knew I wanted to do a duvet cover or something that would get a lot of use. I finally had a flash of inspiration one morning when I woke up (does that happen to other people?) and decided to do strips of pieced fabric alternating with strips of a solid.
I cut each 10x10 piece into thirds and grouped the fabrics by lights & darks. I sewed these into strips, alternating light & dark. At first I planned to piece these on the seams but realized the individual cuts weren't all exactly the same length so, to save my sanity, I ended up offsetting the seams.
The solid is a sheet from Ikea (hence the matching pillow cases! woo!) and the back is made from another sheet. I really should have taken pictures of the process. I don't have much floor space in my apartment and sewing something this size is quite an operation. I needed to move my couch, plants, desk all as far out of the way as I could. My ironing board was in my kitchen, so that presented a challenge when my sewing time overlapped my need-to-eat something time.
Overall, I'm pretty happy with it. I like the fact it's a departure from my usual color palette (but it still has my beloved blues represented). Nice to check this one off my to-make list.
Tuesday, October 23, 2012
Designer Appreciation - Veera Välimäki
If you knit and read blogs, chances are you are familiar with Veera Välimäki's designs. Her blog 100% Rain showcases her designs, which are modern, cozy and wearable.
(Note: It could be construed that the timing of this post is suspect. I was planning this salute to Veera's designs when I decided to get back into my blog. It is pure, happy coincidence that I happened to win a draw on her blog yesterday!)
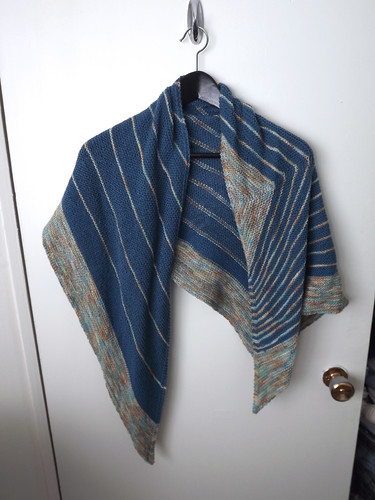
Like many blog & Ravelry lurkers I initially succumbed to the call of the gorgeous garter striped shawl: Stripe Study.
Pattern: Stripe Study - Veera Välimäki
Yarn: Araucania Ranco Multy & Sandnes Garn Sisu (green/teal)
Date: May - June 2011 (yikes I'm behind on finished project posts!)
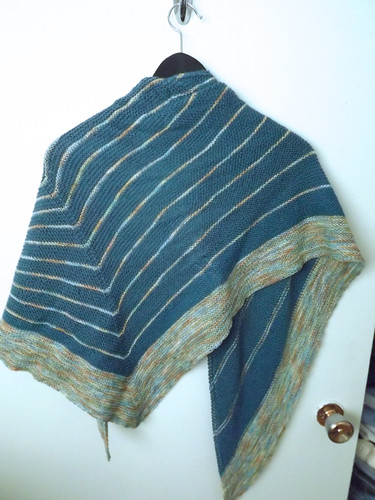

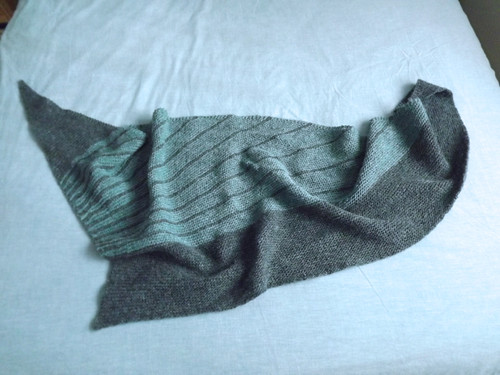
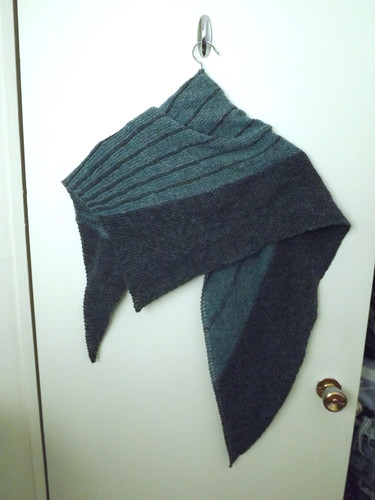
Almost immediately after Stripe Study (in fact, according to my Ravelry notes, it was at the same time as the Stripe Study) I started Different Lines. I think this shawl/scarf has gotten more consistent use than anything I've knit in the past few years. The shape makes it a great neck warmer for cold Canada winters and the yarn is so soft.
Pattern: Different Lines - Veera Välimäki
Yarn: Sandnes Garn Sisu
Date: May 2011
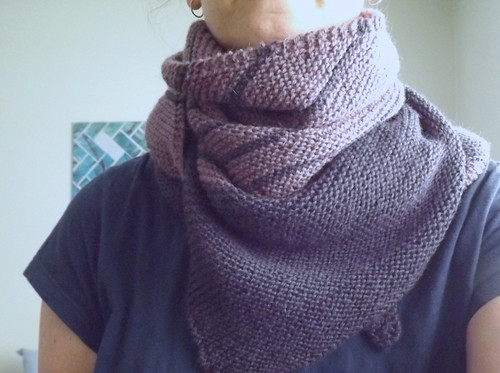
The short-rows give it this shark fin shape which is really interesting.

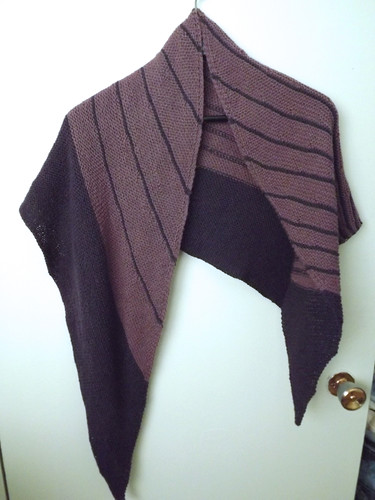
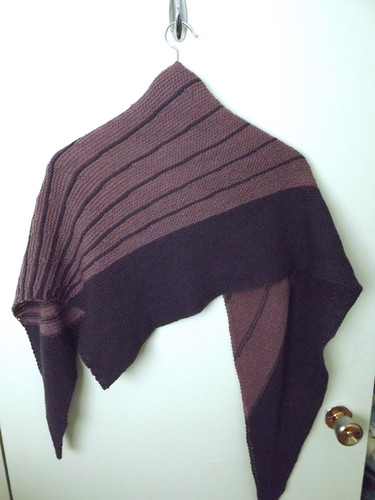
Shortly after finishing Different Lines I, um... I knit another one. I have no defence other than to say it's a great pattern and I was smitten by the colors in the yarn I found. The Briggs & Little Sport is more "rustic" and is just the right amount of wooly-feeling for a slightly heavier version of this shawl. It's great for -30C mornings when it's windy & snowing. (It also matches my bedding)(and my down jacket)(I realize I have a color rut)
Pattern: Different Lines - Veera Välimäki
Yarn: Briggs & Little Sport
Date: June - July 2011
Note: I'm probably not done with Veera's striped shawls. I have Color Affection (just looking for the right yarn/color combination) and I wouldn't be surprised to find myself knitting another Different Lines at some point. Likely soon. In fact... *makes note to scan stash for potential Christmas gift yarns*
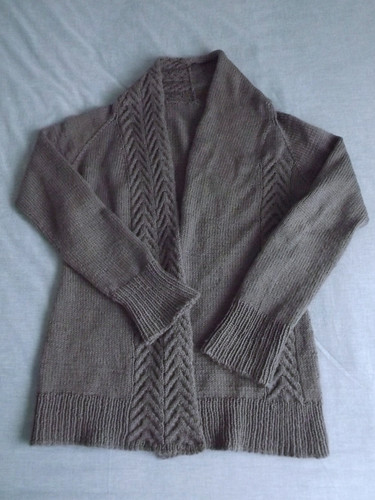
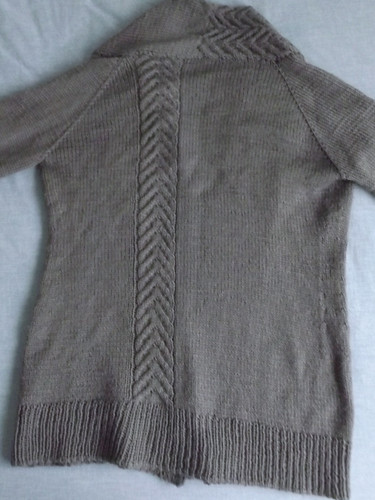
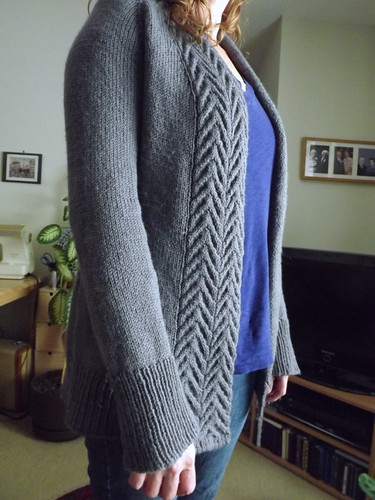
Veera doesn't just design addictive striped shawls, oh no. I fell HARD for her Water and Stone cardigan last winter. It took me probably 1.25 minutes after seeing it on her blog to ordering the pdf and then the yarn. This cardigan was worn at least twice a week (had to pace myself so I didn't wear it out) from the time it was finished until it was too warm to wear wool. I would definitely knit this one again.
Pattern: Water and Stone - Veera Välimäki
Yarn: Knit Picks Wool of the Andes Sport - Ash
Date: December 2011 - February 2012

I have a few other Veera Välimäki patterns on my to-knit list but I should probably finish up some other in-progress knits first.
(Note: It could be construed that the timing of this post is suspect. I was planning this salute to Veera's designs when I decided to get back into my blog. It is pure, happy coincidence that I happened to win a draw on her blog yesterday!)
Like many blog & Ravelry lurkers I initially succumbed to the call of the gorgeous garter striped shawl: Stripe Study.
Pattern: Stripe Study - Veera Välimäki
Yarn: Araucania Ranco Multy & Sandnes Garn Sisu (green/teal)
Date: May - June 2011 (yikes I'm behind on finished project posts!)
Almost immediately after Stripe Study (in fact, according to my Ravelry notes, it was at the same time as the Stripe Study) I started Different Lines. I think this shawl/scarf has gotten more consistent use than anything I've knit in the past few years. The shape makes it a great neck warmer for cold Canada winters and the yarn is so soft.
Pattern: Different Lines - Veera Välimäki
Yarn: Sandnes Garn Sisu
Date: May 2011
The short-rows give it this shark fin shape which is really interesting.
Shortly after finishing Different Lines I, um... I knit another one. I have no defence other than to say it's a great pattern and I was smitten by the colors in the yarn I found. The Briggs & Little Sport is more "rustic" and is just the right amount of wooly-feeling for a slightly heavier version of this shawl. It's great for -30C mornings when it's windy & snowing. (It also matches my bedding)(and my down jacket)(I realize I have a color rut)
Pattern: Different Lines - Veera Välimäki
Yarn: Briggs & Little Sport
Date: June - July 2011
Note: I'm probably not done with Veera's striped shawls. I have Color Affection (just looking for the right yarn/color combination) and I wouldn't be surprised to find myself knitting another Different Lines at some point. Likely soon. In fact... *makes note to scan stash for potential Christmas gift yarns*
Veera doesn't just design addictive striped shawls, oh no. I fell HARD for her Water and Stone cardigan last winter. It took me probably 1.25 minutes after seeing it on her blog to ordering the pdf and then the yarn. This cardigan was worn at least twice a week (had to pace myself so I didn't wear it out) from the time it was finished until it was too warm to wear wool. I would definitely knit this one again.
Pattern: Water and Stone - Veera Välimäki
Yarn: Knit Picks Wool of the Andes Sport - Ash
Date: December 2011 - February 2012
I have a few other Veera Välimäki patterns on my to-knit list but I should probably finish up some other in-progress knits first.
Thursday, October 18, 2012
Peg People
I thought I'd start off my "what I made" posts with one of my favorite things I've made in a really long time. As is my tradition I start off with a seemingly unrelated story.
This spring, my younger brother & his family made the decision to take a position with his company in Houston, Texas. They would be driving down when it came time to move and I offered to go with them to share the driving and spend time with them (and have a bit of a vacation). (We drove from Okotoks, just south of Calgary, Alberta to Houston in 5 days. It was awesome. And a bit tiring.) Because I am me, I had to make something for my nephews & niece before the trip.
I'm not exactly sure how I settled on Peg People, but I probably saw something on a blog that inspired theobsession idea. I found a couple of small packages of pegs at Michaels and started painting. (I ended up buying a bulk bag of pegs from an online supplier out of Ontario: Stockade)
Armed with Google Image searches I sketched a quick outline of what I wanted on the peg in pencil and then painted with craft acrylics. Each peg person got 2 coats of varnish to finish off.
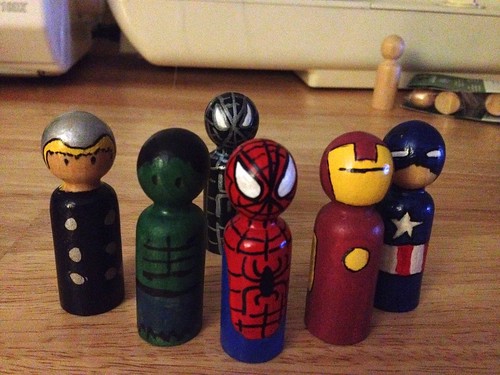
It started with Spider Man. (One of my twin nephews has been OBSESSED with Spider Man since he was about 2 (possibly earlier). If you sit still long enough you will hear a long treatise on various aspects of the Spider Man world and the right and wrong of his actions etc.) From there I ended up making some more of the Avengers (the boys had just seen and loved the movie) and Black Spider Man (AKA Venom).
For my princess obsessed niece I had to make princesses. This is where I ended up getting a little carried away. I decided to make a set each for my friends' daughters and then another set each for a coworker's daughters. It was a little spooky when they were all done.
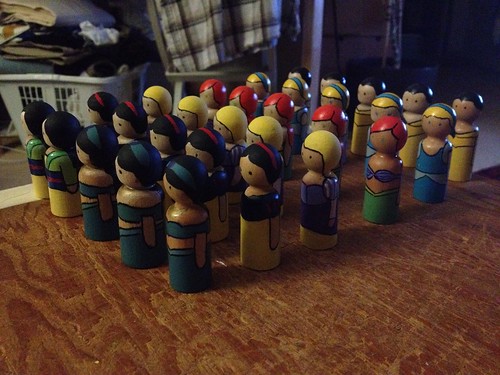
For my friends' daughters I did a Mulan and for my niece & coworker's girls I did Jasmine.
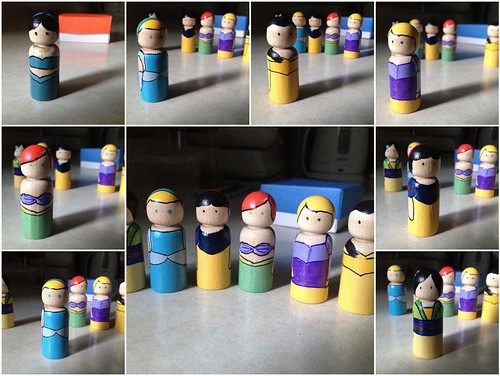
(just realized I have Cinderella in the mosaic twice but imma leave it.)
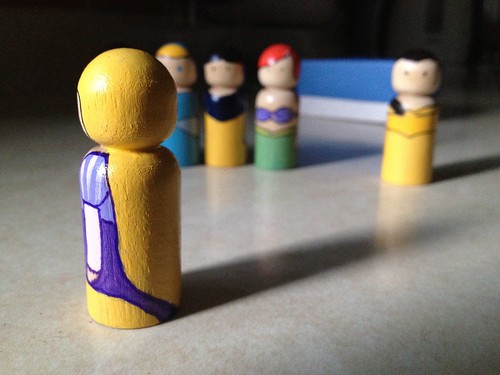

Rapunzel's hair wraps around her body and Ariel has a tail.
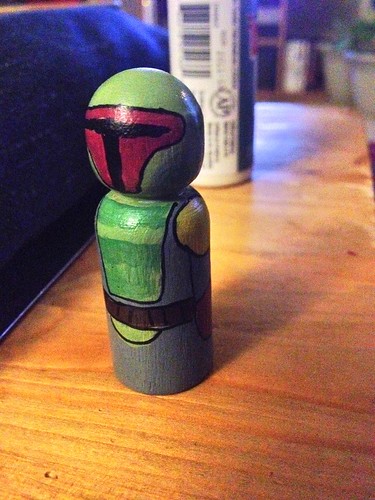
After I finished the super guys & princesses I decided to make a Boba Fett for The Boy's birthday. He is a Star Wars fan to say the least and is always looking for Boba Fett items. I like how this guy turned out and The Boy loved it. (for those new here The Boy is not my son)(I don't have kids)(or cats)(or, sadly, a dog).
My friend Wen Shu's birthday is 2 days after The Boy's and she is a HUGE Mad Men fan (as am I). I decided to make her the Sterling Draper Cooper Price people (and Betty) for her birthday.
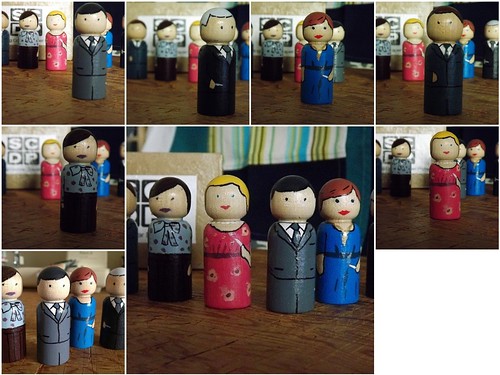
I love how they turned out. Joan has her gold pen and several of them are smoking (for SHAME).
I have more of these pegs and keep thinking of other ideas. I think next up will be some zombies (OHHHH are any of you Walking Dead fans?! I need to make sure I'm not knitting while I watch that show. or eating.)
I just remembered something about blogging. I never know how to end posts. Do I just stop talking? (This is also a problem in face to face interactions. I'm not so good at parties or other social situations) Imma just stop talking, er writing.
Thanks for stopping by & for all the welcoming comments yesterday. I missed you guys!
oh hey, whaddya know? I did figure out how to end it after all. Aaaaaand now I've messed that up.
This spring, my younger brother & his family made the decision to take a position with his company in Houston, Texas. They would be driving down when it came time to move and I offered to go with them to share the driving and spend time with them (and have a bit of a vacation). (We drove from Okotoks, just south of Calgary, Alberta to Houston in 5 days. It was awesome. And a bit tiring.) Because I am me, I had to make something for my nephews & niece before the trip.
I'm not exactly sure how I settled on Peg People, but I probably saw something on a blog that inspired the
Armed with Google Image searches I sketched a quick outline of what I wanted on the peg in pencil and then painted with craft acrylics. Each peg person got 2 coats of varnish to finish off.
It started with Spider Man. (One of my twin nephews has been OBSESSED with Spider Man since he was about 2 (possibly earlier). If you sit still long enough you will hear a long treatise on various aspects of the Spider Man world and the right and wrong of his actions etc.) From there I ended up making some more of the Avengers (the boys had just seen and loved the movie) and Black Spider Man (AKA Venom).
For my princess obsessed niece I had to make princesses. This is where I ended up getting a little carried away. I decided to make a set each for my friends' daughters and then another set each for a coworker's daughters. It was a little spooky when they were all done.
For my friends' daughters I did a Mulan and for my niece & coworker's girls I did Jasmine.
(just realized I have Cinderella in the mosaic twice but imma leave it.)
Rapunzel's hair wraps around her body and Ariel has a tail.
After I finished the super guys & princesses I decided to make a Boba Fett for The Boy's birthday. He is a Star Wars fan to say the least and is always looking for Boba Fett items. I like how this guy turned out and The Boy loved it. (for those new here The Boy is not my son)(I don't have kids)(or cats)(or, sadly, a dog).
My friend Wen Shu's birthday is 2 days after The Boy's and she is a HUGE Mad Men fan (as am I). I decided to make her the Sterling Draper Cooper Price people (and Betty) for her birthday.
I love how they turned out. Joan has her gold pen and several of them are smoking (for SHAME).
I have more of these pegs and keep thinking of other ideas. I think next up will be some zombies (OHHHH are any of you Walking Dead fans?! I need to make sure I'm not knitting while I watch that show. or eating.)
I just remembered something about blogging. I never know how to end posts. Do I just stop talking? (This is also a problem in face to face interactions. I'm not so good at parties or other social situations) Imma just stop talking, er writing.
Thanks for stopping by & for all the welcoming comments yesterday. I missed you guys!
oh hey, whaddya know? I did figure out how to end it after all. Aaaaaand now I've messed that up.
Wednesday, October 17, 2012
tap tap tap... is this thing on?
uh, Hi. anyone out there?
Due to some changes in my life (*cough*ilostmyjob*cough*) I have some extra time on my hands. I thought I'd give this blog another go. I'll need to re-learn how to do everything (and figure out the changes Blogger may have made) and get back into the swing of things here.
My plan is to put up some gallery type posts over the next week instead of trying to do individual posts for things I've made. I don't have start/finish dates for anything I made so I plan to do groups of types of FOs/UFOs and go from there.
So for now, Hi. Welcome (back).
Lori
note: I did "lose my job" but I had already started the process of looking for a new job when it happened. It's really a good thing, so don't worry! I desperately needed to take time off and needed to be FORCED to do so (I had a lot of banked vacation time). I'm trying to figure out how to just relax & not feel obligated to fill my time with busy work.
Sunday, December 11, 2011
New Coat 2.0
Oh wow, I love this coat.

Pattern: Simplicity 2508 ("Inspired by Project Runway"). View C (I think), collar C
Outer Fabric: Cotton corduroy. It's a bit stiff but so soft & cozy at the same time. It will relax with wear and I'm sure I'll be wearing this a lot this winter.
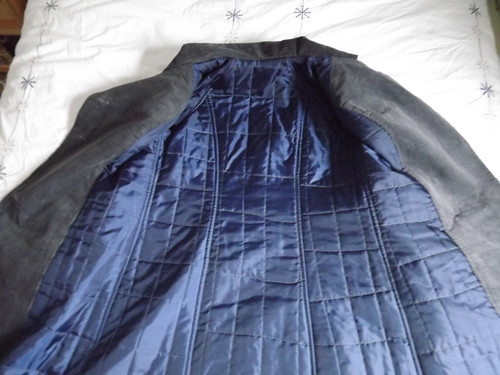
Lining fabric: I made my own quilted lining with a polyester lining fabric and a wool batting from the quilting store. I thought this would add enough warmth that I can wear the coat in the winter without adding too much extra bulk. I'm quite happy with it but haven't tested it in the real cold yet.
Mods: None that I can remember. Oh, I moved the back tab thing (name?) down about 2-3 inches and added about 3 inches to the sleeve length. I may have overcompensated on the sleeves but they're definitely nice & long now.
I'm really glad I made the other version first because that really made this version go much smoother. I started cutting the pieces last Sunday and finished sewing Saturday afternoon.
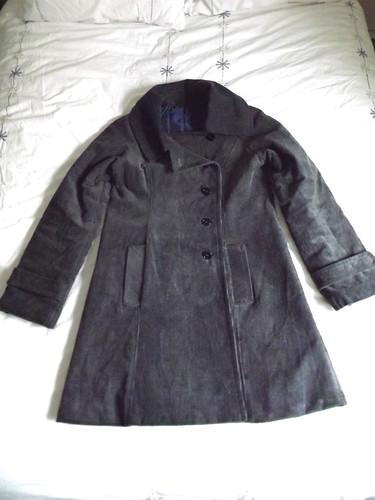
I haven't ever had a coat that has the closure off to the side but I really like the look. It's very warm with a double layer in the front. I made the welt pockets on seam again for this version. I tend to walk with my hands in my pockets so this style is more practical for me.

(I think i was just standing funny. I don't think the coat bunches up like that normally)
The only real "d'oh" moment I had was when I went to sew together the first pieces, after cutting all the outer fabric. I was being so careful with the pattern pieces to make sure they were all situated on the corduroy the same way so i wouldn't have the nap going different directions. I was pretty impressed with my efforts until I realized I had placed (and cut) them all so the nap was upside down. It's not something anyone would notice unless they were petting my arm (or other area which we are NOT encouraging), but I notice and it's definitely a "d'oh".

Now back to Christmas Present knitting and Christmas baking. I'd love to hear what other people are making for the holidays. I haven't fully decided on my baking list and I have to come up with gifts for another couple of people.
Pattern: Simplicity 2508 ("Inspired by Project Runway"). View C (I think), collar C
Outer Fabric: Cotton corduroy. It's a bit stiff but so soft & cozy at the same time. It will relax with wear and I'm sure I'll be wearing this a lot this winter.
Lining fabric: I made my own quilted lining with a polyester lining fabric and a wool batting from the quilting store. I thought this would add enough warmth that I can wear the coat in the winter without adding too much extra bulk. I'm quite happy with it but haven't tested it in the real cold yet.
Mods: None that I can remember. Oh, I moved the back tab thing (name?) down about 2-3 inches and added about 3 inches to the sleeve length. I may have overcompensated on the sleeves but they're definitely nice & long now.
I'm really glad I made the other version first because that really made this version go much smoother. I started cutting the pieces last Sunday and finished sewing Saturday afternoon.
I haven't ever had a coat that has the closure off to the side but I really like the look. It's very warm with a double layer in the front. I made the welt pockets on seam again for this version. I tend to walk with my hands in my pockets so this style is more practical for me.
(I think i was just standing funny. I don't think the coat bunches up like that normally)
The only real "d'oh" moment I had was when I went to sew together the first pieces, after cutting all the outer fabric. I was being so careful with the pattern pieces to make sure they were all situated on the corduroy the same way so i wouldn't have the nap going different directions. I was pretty impressed with my efforts until I realized I had placed (and cut) them all so the nap was upside down. It's not something anyone would notice unless they were petting my arm (or other area which we are NOT encouraging), but I notice and it's definitely a "d'oh".
Now back to Christmas Present knitting and Christmas baking. I'd love to hear what other people are making for the holidays. I haven't fully decided on my baking list and I have to come up with gifts for another couple of people.
Wednesday, November 16, 2011
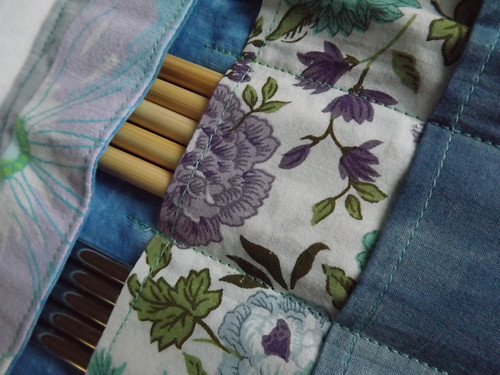
DPN Roll
A couple of weekends ago I wanted to make a pair of mittens so I had to go through my cup of unsorted (gasp) DPNs (double pointed needles for any non-knitters) to find the needles I needed. I thought "I really should make a needle holder for these" which is what I thought every single time I needed anything out of that cup.
So I finally just got off my butt and made one.
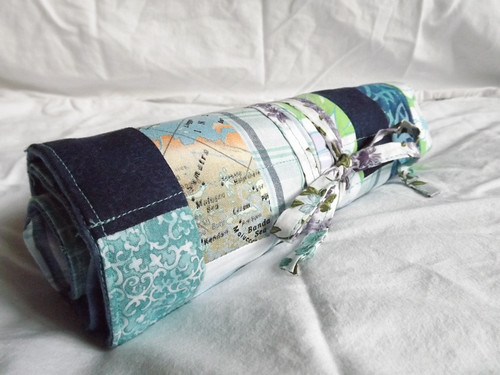
The outer fabric was leftover pieced scraps from a previous project and the inner fabrics were an assortment from stash.
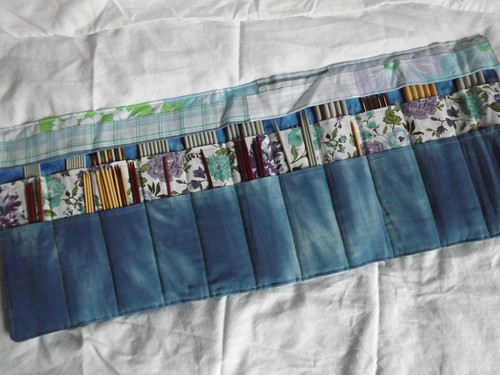
I consulted a variety of tutorials but in the end just winged it based on the measurements of the outer fabric and the number of sets I had.
I feel so much better now, having all the DPNs in their homes, sorted and ready to be used.
So I finally just got off my butt and made one.
The outer fabric was leftover pieced scraps from a previous project and the inner fabrics were an assortment from stash.
I consulted a variety of tutorials but in the end just winged it based on the measurements of the outer fabric and the number of sets I had.
I feel so much better now, having all the DPNs in their homes, sorted and ready to be used.
Subscribe to:
Posts (Atom)