Tuesday, December 21, 2010

"All you have to do is..."

Yarn Ball Wreath
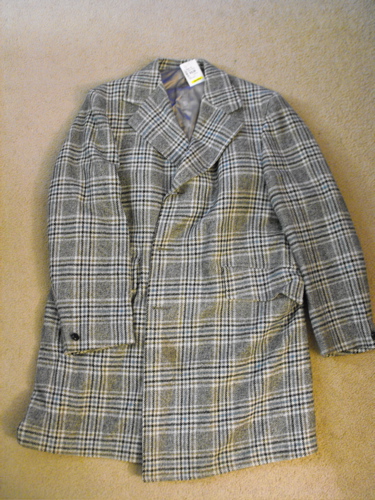
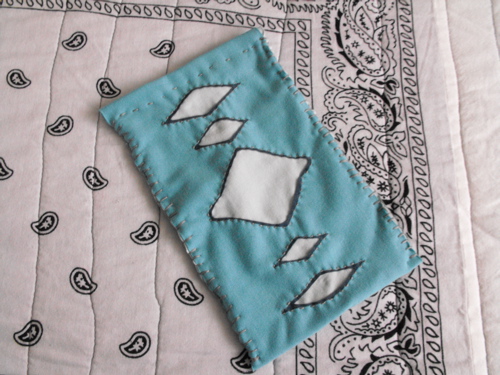
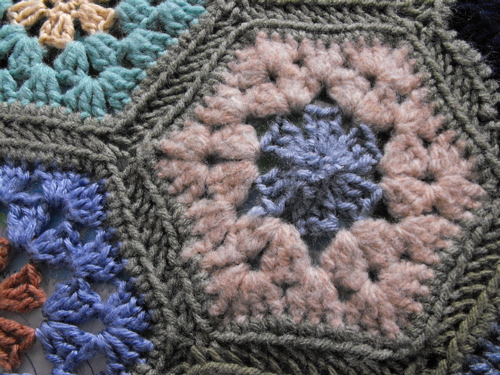
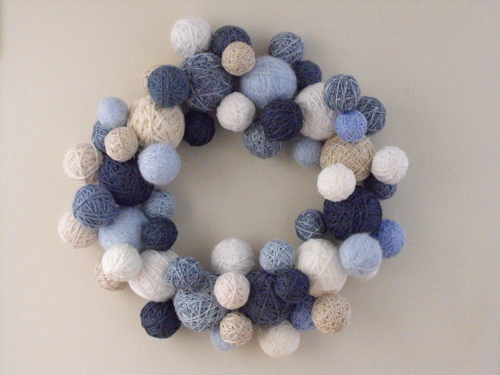
yarn ball wreath - nothing to do with this post but I made it a month ago, haven't shown you yet, and wanted a picture for this post

Last night while talking with The Boy I mentioned that I had one friend I wouldn't see until long after Christmas so there wasn't any great pressure to get her gift finished. In fact, I told him, I wasn't 100% sure what her gift would be. I was pretty sure I was going to make her socks (Skew from Knitty) but I might make her a scarf (Saroyan possibly) or maybe an apron or something for the kitchen.

The Boy, unfamiliar as he is with the brain of a knitter even after all these years, was astounded. "Is there ever going to be a year when you've completed your Christmas gifts more than 72 hours before Christmas?"

He then came up with a solution for this issue that, if I were to apply it (according to him) would solve all of my time troubles. I thought I would share it with you, dear crafting friends, so you too may laugh yourself silly benefit from his wise council.

Here it is. You ready?

"All you need to do is: make a list NOW for next Christmas and then all year long you can make the items on the list and ONLY the items on the list. So in June when you want to knit something different you can see you're not done the list so you just knit what's on the list instead."

(at this point I started to laugh, basking in his wisdom as I was)

"But," interjected I, "what if I come across something better suited for that person in between now and Christmas?"

The Boy's solution: "Put it on the next year's list. Sure you may end up making Spiderman footie pajamas for a 14 year old. 'Sorry nephew I wanted to put these on my list in 2011 but they got bumped to 2019" but you will be sticking to your list and you will be ahead for Christmases to come."

It was around this point that I began having trouble breathing I was laughing so hard and I discovered that the new yoga DVD I had been trying must be working on my abs more than I thought.

So, dear friends, there you have it. All of your Christmas time crunch troubles resolved thanks to the time management advice of The Boy.

Hope you are all enjoying the lead up to Christmas (if you celebrate it) and not stressing over any of your preparations.

Merry Christmas and Happy New Year!

Sunday, November 28, 2010

Wool Plaid Purse

I've had this idea for a new purse knocking around my head for a while now. This weekend I finally went to Value Village to get my "material" so I could go from this:
DSCF1027

to this:
Wool plaid purse

The coat seems to be from the 70s or so but I could be wrong on that. The label seemed really old anyway. Deconstructing the coat was really interesting, in the most dorky way possible. I'm pretty sure it was constructed by a tailor, not a sweatshop (or similar) as the details were really precise. The interfacing in the front and lapels was burlap and cotton and there was a lot of hand stitching tacking the interfacing in, or the overlap for the welts. The matching on the plaid was especially impressive. I didn't even notice it until I started cutting into the coat:

DSCF1033

I actually felt a little bad taking it apart when I realized how well-made it was. Obviously I didn't feel bad enough to stop or change my plan but...

Wool plaid purse

It's a basic tote type bag with a lining with pockets. I rounded the corners on the bottom and used a very short shoulder strap so it would slouch in the center when carried. The shoulder strap and tab closure are leftover leather from my purse I made from a leather coat. The tab closure has a magnetic snap to keep the bag from gaping open. I used a lightweight woven fusible interfacing on both the outer and lining fabrics which now I'm not sure I needed as it makes it a little stiff. I think it will hold up better this way in the long run though so I'm glad I used it.

The only thing I'm still not sure of is whether I should have inserted a gusset for the sides/bottom to give me more room. I think it probably looks more polished this way as I would (will) be likely to carry a bunch of stuff with me and would have done more so with more room in the bag.

In all I'm really happy with it. It's almost exactly what I had imagined. It was one of those mornings when I wake up with an idea and I don't stop until it's done. It's always nice when those ideas come on days when I actually can work on the idea!

Now back to Christmas gift knitting... What are you all (all y'all?) working on? I may need ideas and would love to hear what everyone else is making.

Tuesday, October 26, 2010

Classic Cardigan

This post should come with a warning: Do not operate heavy machinery while viewing this post. Do not attempt complex calculations while viewing this post.

I've been mentally referring to this cardigan as the World's Most Boring Knit for some time now. Miles and miles and miles and miles and miles of stocking stitch knit in fingering (sock) weight yarn on US 5 needles. Good for TV watching, bad for attention holding.

But, alas, I present to you my new favorite knit. It's cozy, it's plain, it will go with pretty much everything... Which are pretty much my only criteria for any clothing I own. High fashion folks, High Fashion.

DSCF1013

yarn Mill ends mystery yarn. It is very similar to Patons Kroy Socks and I think that's probably what it is but it was sold by the pound in unmarked bags which sounds far more sketchy and intriguing than it was.
pattern Classic Lines Cardigan from Knit Picks
mods Substituted sock weight yarn for double stranded lace weight; added ribbed button bands; tacked down steeked edges to create a facing

Classic Cardigan

As boring as all the knitting was (and by boring I mean: easy, no-thinking knitting) once it was off the needles it got interesting.

The yarn is wool but its sock yarn and non-felting. I ended up machine sewing my steeks out of fear that any crocheted steek wouldn't hold (it probably would have held but I was paranoid). I managed to sew the steeks without distorting the fabric which felt like a victory. I took several deep breaths, got out my sharp pointy scissors and cut the steek before I could chicken out. Now I was left with a ragged mess on the cut edges.

steek after cutting

I picked up and knit 1x1 ribbed button bands (the pattern calls for a band that is knit in stocking stitch and folded back to form a facing. no buttons). I had planned to hand sew in a length of grosgrain ribbon to cover the cut edge. While I was trying to figure out the best way to do that I was frustrated that the cut edge kept rolling under and I couldn't get it to lay flat. Then I realized the rolled edge looked like a finished facing and... voila!

steeks tacked down

I tacked the steek to the cardigan to form a facing and it's perfect. It has a little bit of bulk but the knit fabric is fairly thin so it's not unwieldy. If the yarn was any heavier weight this likely wouldn't have worked. As it is, it provides stability at the button band edges.

DSCF1023

After it was all knit and finished I started digging through my button jar. I put button holes fairly close down the front and ended up with 12 in total. I have in my possession approximately 7,000,000 buttons but I couldn't find 12 that fit the following criteria: match each other, match the sweater, right size. So, much to The Boy's amusement (he thinks the very existence of the button jar is ridiculous), I had to buy buttons for my cardigan.

DSCF1011

The cardigan actually turned out a bit big in the arms and the neck band. It was liveable but I figured maybe a wash would help sort that out. The yarn also smelled REALLY strongly of wool and a slight chemical smell (even after 4+ months of knitting). I knew the yarn wouldn't felt so, gathering my bravery (and stupidity) I put the cardigan in a mesh laundry bag and (you may want to be sitting down for this) I threw it in the wash. Yes. In the washing MACHINE.

It came through the wash with no issues, the tacked down steeks held beautifully. It had grown in the wash so I (yes, you should stay sitting down for this) threw it in the dryer.

Sometimes bravery/stupidity pays off. The sweater shrunk just a touch in the right spots. The facings and hems puffed up a bit which was odd but a quick blast of steam from the iron put them all back into shape. I can't believe that worked and I can't believe I even tried it. I don't think I'll do that again soon!

Sunday, September 26, 2010

Chevron Cushion

You know how sometimes you get the itch to make something and you keep thinking about it and mentally working on it until you just get it out of your system?

I've been obsessed with the chevron striped pillow that Dana at Made posted. I kept seeing it pop up on all the Craft link sites I follow.

The thing is, bold brightly colored striped home furnishings are really not me. That didn't make any difference, I just kept thinking about it.

I finally just broke down, dug out the striped fabric remnant I had from Ikea and gave it a go.

Chevron cushion

I was playing around with the strips and really liked how it looked with the dark/light bands offset. It's still not very "me" but I really like it.

chevron cushion back

I didn't have enough of the striped fabric to do both sides, so the back is a simple white cotton with overlapping edges (envelope style? brain not working). The cushion is 12"x17" (ish) and I made a little cushion to put inside.

At the moment it's on my couch where it clashes emphatically. But... I'm so glad I gave in and made it!

Saturday, September 25, 2010

Birthday Play Mats

Crafting for boys is always a bit tricky (as those of you who are parents of boys would know) so I was super excited to come across these play mats (and here) on Serving Pink Lemonade. My twin nephews turned 5 in August and I thought these would be perfect for them.

Now, if you've been around here a while you may know that I have a tendency to over think things and frequently end up doing things the hard way. This was one of those times.

I decided to make 3 mats for each of the boys: one town for driving cars, one landscape for playing with dinosaurs and one street scene for playing with Spider Man (one nephew is slightly obsessed with Spider Man).

I sketched my plans and quickly decided I wanted to make them 11" x 17" and foldable. I started out with felt but after many attempts I gave up. I kept envisioning painted fabric for the backgrounds. I had some heavy weight cotton canvas from an old couch cover that was perfect for this project.

After painting I added details to each with felt cutouts sewn to the painted canvas. I backed each one with some lightweight denim (forgot to take a picture of it). I made binding strips and sewed it on by machine (which took 5 or 6 false starts before I was happy with it)(oy).

Boys' Gift - Dino land

Boys' Gift - street

Boys' Gift - town

I'm really happy with how they turned out. I found tubes of tiny dinosaurs, Hot Wheels cars & Spider Man figures that are all the perfect sizes (and they were all on sale for really cheap! score!) to go with the mats.

And, to further demonstrate how I can't ever just let enough be enough, I made a tote bag for each boy to carry the mats folded and all the cars, dinos & Spider Man(s).

Boys' Gift - bags

They're made out of a lightweight denim (the same as the back of the mats) with webbing straps. I cut the boys' initials out of felt and just sewed it on to the bags before sewing.

The package is on the way to them now, but my nephews don't read my blog (that I know of) so it should be okay to post this. :)

I haven't been very good at keeping up around here lately. Thank you all for the kind comments and for reading even when I'm not very good at posting regularly! I have pictures from summer projects and will try to get caught up over the next week or so.

As for today, we're finally supposed to have some nice weather so I'm going to try to get out there. While the rest of the continent seemed to be going through the hottest summer in a long time, Alberta had a cool, rainy summer. I heard that we had less than 15 days above 25C all summer long (last year during the same time period we had 46 days above 25C). The coming week's forecast for 20C weather is making me happy, even with the trees turning colors already. I have fall knitting projects in the works which I'll try to get in progress shots of soon.

Thursday, August 12, 2010

Altered Cardigan

Altered cardigan - crochet band

For a long time now I've been thinking about making a cardigan with crocheted button bands out of one (or more) of my long sleeved t-shirts that are a bit too tight (ehem). On the August long weekend I came across the stash of no-longer-optimal-fit t-shirts and decided to give it a try.

Altered cardigan - crochet band

I used a v-neck shirt with 3/4 length sleeves that I really liked but was a bit too small (don't have ANY idea how that happened)(ehem). I measured and drew a line down the center of the shirt and cut. Then I folded over about 1/4 inch and stitched a line of straight stitches to tack the facing down. I stitched a line of blanket stitch down each edge to give me a foundation for the crochet bands. I used some crochet cotton I had (I lost the label) in a color that in some lights is an exact match for the shirt.

Altered cardigan - button

I worked 6 rows of single crochet and then a scalloped edge. The crochet curled on the corners so I did a line of single crochet across the tops & bottoms to help tame it a bit. I added a button (from the stash I found in my Mom's knitting bag) which fits perfectly in the space in the scallop edge.

Altered cardigan

I'm really happy with how it turned out. I have plans to do another one or two. I love that I am able to extend my wearable wardrobe by reusing items I thought were no longer wearable.

Altered cardigan

Predictably the day after I completed this cardigan, I saw a similar project on one of the craft blogs! Does that happen to other people or just me? I find it really interesting that so many people can come up with the same basic idea (or variations on the same idea) independent of each other.

Friday, August 06, 2010

Mom's Knitting Bag

This past weekend I needed to find something in my closet where I keep mostly craft stuff (aka "The Closet of Doom" or "Don't open that door!"). I ended up hauling everything out because I couldn't find what I was looking for. This led to me finding stuff I had forgotten about which led to ... let's just say it's like when you click on a link that takes you to another link and that takes you to another link and 4 hours later you can't figure out what you've been doing or how you got there.

Anyway, this impromptu cleaning out session unearthed a pile of t-shirts that were not good enough to give to Salvation Army but not icky enough to throw away (who am I kidding? "throw away?" nothing gets thrown away. Hence the Closet of Doom). I sorted through them pulling out shirts for a blanket project I had started (more on this soon, it's almost done) and set aside a couple to try making cardigans, which is something I've always had in my head to try. (more on this one soon too. Forgot to take pictures).

Anyway (i do this alot. sidetrack myself and then need to bring myself back around)... After all that, I needed a tiny crochet hook for the cardigan making. I knew there had been a set of teeny tiny steel hooks in my Mom's knitting bag so I had to go off on another search through the closet, the bag was in there but it hadn't turned up on the first go around. I eventually found the bag and the second I opened it... I burst into tears.

These are the knitting needles and crochet hooks I learned on. It was like a Mom museum exhibit, complete with the last thing she was knitting before she started deteriorating. I had myself a good cry and decided to document the contents. I want to try to find the pattern she was using for the baby sweater. I'm not sure if I have the yarn she was using (it's probably in the closet of doom) but I'll give it a shot.

knitting needles

Most of the knitting needles are in the old Canadian sizing (British? My stitch dictionary lists the sizes as "Canadian" meh, who knows). The huge needle at the top was for "Condo Knitting" which was apparently the rage at some point in time. (too lazy to google at the moment)

crochet hooks & stitch holders

I learned to crochet with the colorful plastic hooks. The tiny ones were my Granny's I think. The wooden crochet hook was made by my Mom's Dad.

crochet hooks

hand whittled crochet hook

teeny tiny crochet hook

I'm pretty sure this teeny tiny hook would pierce skin. I kind of think I know that from experience...

buttons and...  eyes?

8 red buttons, only 2 of which match. I think the pink buttons were intended for the project she was knitting. I have no explanation for the bag of eyes. I think she was making crocheted "worm" bookmarks or something. Maybe that's it.

baby sweater in progress

Baby sweater WIP. I think this was probably intended for one of my 3 year old nieces when they were babies. It made Mom really sad and frustrated when she couldn't concentrate on knitting or crochet anymore. I would really like to finish this sweater for her if I can find the pattern & yarn.

pattern books & magazines

Friday, July 16, 2010

Reverse Applique Bag

small slow stitch bag closeup

I've been seeing these beautiful reverse applique items all over blog-land for a couple of years now and have been fascinated by them. I've always wanted to try the technique but have never felt very confident with my hand-stitching abilities.

Then I saw this tutorial by Beki at Artsy-Crafty Babe and was hooked. I thought about it all day at work yesterday. (I'm sure my employer appreciates that).

When I came home, I looked for the freezer paper I knew I had bought a couple of years ago. It wasn't where I thought it was, but a yardstick I had "lost" over a year ago was there. I have a corner in my apartment that I refer to as the "Bermuda Corner". I have lost more items in that corner in the years I've lived here than I can count. I live alone. How can these things keep going missing??

I eventually located the freezer paper (in a closet. who put that there?) and then couldn't find the t-shirts I had started cutting up for another project (that I haven't ever mentioned. I'm an excellent craft blogger, aren't I? yeeshk). This led to a complete overhaul of my sewing shelves to find the fabric (on the bottom) but now that area is tidy, so yay, bonus!

My paints were where I thought they were and the textile medium was exactly where I thought it was (because it had never been in the Bermuda Corner. Obvs.) so I got going on stenciling a simple design on my fabric. I decided to do a small bag (about 3" x 6" complete) so if my mad hand stitching skillz failed me it wouldn't be too big a write-off.

You know how you get a project idea in your head and you have to start it RIGHT THAT SECOND or you won't be able to concentrate on anything else? (Yeah, I know you do. That's why we all get along so well.) So I painted my design and then my brain went "Oh, wait. Paints are wet. This has to dry before any stitching can be done." and then my brain said "Huh? wait? no one said anything about waiting." and pouted for a while.

I used my hairdryer. I'm not ashamed to admit that.

Eventually it was dry and I got going on stitching. I'm not very good at even stitches by hand so it's very very very "homemade" as opposed to "charmingly handmade" but I am very happy with my first attempt at this process. (and I used the word "very" 5 times in that sentence so I'm sure my writing award is on its way, no?) I decided to complete the bag by hand, just to see if I could do it. I did a "charmingly handmade" (ha) wonky blanket stitch up both sides and turned the top edges under with a straight stitch to leave a casing for a draw string if I decide I want one.

small slow stitch bag

I will definitely be attempting more of this technique. I love the finished look, and who would have guessed at the colors I pulled out for this practice bag? (ha. ehem). For now this is holding my sunglasses in my bag but I think it might end up seeing use as a sock-in-progress bag.

Wednesday, July 14, 2010

Nature/Nurture

This morning as I was watering my plants I saw something in one of the pots.

What is that?

What is that? Is that a...?

is that?  what?

I think it IS a...

Attack of the mushrooms

MUSHROOM. In my lily plant!

It's kind of cute though. I might leave it for a while. Until it grows big and not cute. Not sure how nature made it into my nurtured plant soil but...

True Confessions time: I hate hate hate mushrooms in/on/as food. I will politely eat them if they are in sauce or in something and it would be rude to pick them out but I have to tell my brain they are something else while eating them. Oddly, I think toadstools & mushrooms are quite pretty when in the wild. (note: a plant in a pot in my living room does not constitute "the wild")

To cleanse the visual palate, as it were: a picture of real nature, where it belongs.

Fishin' in the rain

The Sunday of the Canada Day Weekend (Canada Day would be July 1, for any non-Canadians) The Boy, his parents, his nephew & I went into Kananaskis in search of a suitable fishing spot. We had light rain/drizzle the entire day and eventually settled in at this lake that I forgot the name of and wow I'm so good at nature/travel blogging.

Thank you everyone who commented on the Bandana (banana?) Quilt! When I made it I was thinking "oh that's a bit Stampede-y" but then just went on with my life. Then about 1 minute after posting I realized how well timed that was, as we are in the middle of Stampede right now! Yee Haw. Bandana Quilt!

Monday, July 12, 2010

Bandana Quilt

Everytime I type "Bandana" I see "Banana" even though I'm the one who typed it. So I keep seeing the caption as "Banana Quilt" and then I go to fix it and oh it's not wrong... aaaaand this is a little glimpse into the fun fun mind of Lori...

Bandana Quilt Close up

For a long time I wanted to try making a quilt using bandanas for the top. I kept putting it off but it was always in the back of my mind. When I finally got around to it, I ended up changing my plan quite a bit, using white cotton for sashing - my original plan was for the whole top to be bandanas. Mostly this was because I couldn't find as many different colors as I wanted while staying within a color palette that I liked. Now that it's done, I am quite happy with it.

Bandana Quilt

This is the biggest quilt I've ever made. It's bi-i-i-ig. Queen size (pictured on a double bed). To make the quilt sandwich I had to move all the furniture to the sides and out of the main area of my very small living room. It's backed with a cotton sheet from Ikea which is a little boring, but my goal with the quilt was cheap thrifty quilting so I couldn't justify buying yardage for a queen sized quilt back.

If you look at the picture at the top you can see the quilting started getting a little (a lot) wonky on me. This is due to the fact that I was machine quilting a queen sized quilt on a 40 year old sewing machine on a table that is 3 feet by 2 feet. (that's the reason I'm sticking with and I can't hear you lalalala)

binding

I love the binding. I used scraps from the western shirt I made last June. I had just enough to bind the quilt, which made me so very happy.

bandana quilt

Predictably, finishing this quilt has just made me want to make more. I think I need a bigger table first. Or a bigger apartment.

Sunday, June 20, 2010

Altered Flip Flops

I have a few finished projects to post so I'll be spacing them out a bit. That way maybe i'll actually post more frequently!

Last weekend was The Boy's birthday. It was finally sunny and warm so we headed out to the Farmer's market in Millarville and then out to Kananaskis to hang out by the Highwood River for the afternoon.

Highwood River

It was such a great day just hanging out, reading, watching The Dog dig up rocks in the river and "accidentally" get into the current and drift down stream. He would happily have stayed in the river as far as it would take him but we didn't think that was such a good idea.

The next day was just as beautiful so I spent most of it sitting out on my little patio reading and enjoying the sun. I decided to work on something I could do outside so I pulled out the $4 flip flops I had picked up and some scraps of fabric and made these:

Altered Flip-flops

(Please to ignore the freaky looking feet)

The tutorial came from Alisa Burke. Mine didn't turn out as cool and random looking as the ones in the tutorial but I like them none the less. I think there will be more of these in my future.

So, that was last Sunday. We had a week of heavy rain and cool temps and then a sunny warm weekend again. I love when that happens. I finally got my plants and planted them (tomatoes, lettuce, peppers and some flowers -- i need to find some herbs and onions yet), so it is now officially Summer for me. (I guess since tomorrow is officially Summer on the calendar it's not just for me... hmm.)

I'll be back in a day or two with another finished project. oooh Anticipation!

Wednesday, May 26, 2010

Recycled Denim Quilt Top

The Boy (who, for those of you who don't know me, is not my son) gave me a stack of old jeans that he was going to give to Salvation Army. He thought I might want to make something out of them. He knows me pretty well by now...

As soon as I saw them I pictured a quilt top made from the jeans. At first I had planned to just cut large pieces and sew them together. As I kept looking at the pile I decided to try a more traditional pieced quilt top. I knew I wanted each block to be oversized, so I started cutting 4 1/2 inch wide strips and began piecing them in a Log Cabin block.

Recycled Jeans Quilt Top

I love how it turned out. It's both exactly what I was hoping for and way better than I had expected. I love how each pair of jeans contributed a different shade.

Now I need to work on my arm strength so I can finish it. This thing is H-E-A-V-Y! The finished quilt top is 80" x 80". I'm planning to make a quilt sandwich with a flannel sheet and a plain cotton backing. I think I'll end up tying it rather than attempting to machine quilt it. (see earlier comment re: weight of quilt and lack of arm strength)

Of course I have a The Boy comment about this project. When I was working on the blocks I had a stack of them on my sewing table. I pointed them out to the Boy and told him that's what became of the stack of jeans he had given me. He looked at them and said "Oh cool. What are you making? A dress?"

(he wasn't serious)(I hope)(the image of a majorly patchworked denim dress nearly did me in and I couldn't breathe for a while from the laughing)

Wednesday, May 12, 2010

Oh! Hi!

So you know how sometimes you have something you're working on and you can't seem to get a good picture of it and then you finish and you think you should post it on your blog and then you forget and then 2 months go by and you still haven't posted and you're pretty sure that anyone who may have once read your blog is now long gone? No? Just me?

I'm going to just jump in here. No real reason I haven't posted... just... you know.

I finally got around to finishing the hexagon afghan I started, um, a year ago... I made the mistake of telling the Boy it was for him which led to weeks, well, really: months of him asking me "is my blanket done?" "are you working on my blanket?" "what's that you're knitting? is that my blanket?"

hex afghan 3

I'm really happy with how it turned out, and the Boy is too. I used up a lot (A LOT) of acrylic scraps. I forgot to count the hexs at the end but it's about 5' x 6' so... a lot.

When I finished I threw it in the wash since it had been sitting around for a year. It was then I found out that a few of the hexs were not acrylic but were in fact random wool that had snuck in. They felted.

hex closeup

Oh well. It adds "textural interest"... ehem.

I also finished another longtime WIP: The Leftover Blanket! This one is more than 2 years old. It's approximately 45" x 55" but I plan on trying to block it a bit bigger. Eventually. To be honest this one is less "Finished" and more "I'm never going to get the will power to make it any bigger than it is so I'm calling it done". The final round was on the needles for months.

leftover blanket 2

It's a great lap blanket size and I can curl up under it when I'm truly curled up. It's all sock yarn so it's mostly wool and very warm. I'm really happy with the final look and I'm VERY happy to call this one done. Whew.

I have a funny email to share with you before I go. The Boy sent me this Monday morning. I was laughing so hard reading it I had tears in my eyes. He suggested I share it with my "Knitter friends"... silly the Boy! I was planning to all along!

From: The Boy
Sent: May 10, 2010 10:40 AM
To: Lori
Subject:

So you left your knitting in my house, no big deal I finished it off for you. Did a quick online seminar on how to knit. It’s quite easy, don’t know why it takes you so long to make this stuff. ANYWAY I didn’t have time to make the sweater with ‘arms’ or a ‘neck’ so I just kept on making the tube part…so it’s less like a sweater and more like a tube…like a tube top. Then I didn’t know how to finish, so I just cut the rope and grabbed the stapler and hammered 6-8 staples into the end so that it would not come apart when you wash it..then again I would not wash it. Oh I ran out of whatever that lousy color was that you were using, because you didn’t provide me with enough wool, so I found some other stuff (I think it said wool but it could have been bailing twine for all I could tell) and kept going. I think the colors match quite well, but that’s for you to decide. I again, didn’t know how to end one color and begin another so I just crazy glued the two together. No big deal but again, I would not wash it.

Anyway you’re welcome, and if I ever hear you complain about how long it’s taking to make something, I’ll know that you’re lying so don’t try to pull that crap on me.

Friday, March 19, 2010

Baby gifts

I can finally show off what I made while I was on my mini-vacation. Woo! It was hard b/c the person I wanted to tell was the person it was for and I had to wait. (Why am I still being vague?) My friend Wen Shu is expecting her second girl. We were planning a surprise baby shower for her and her husband (he works with me too) at work so I had to keep quiet until then.

Baby Quilt

I bought 10 fat quarters in bright "girl" colors and cut 20 squares (don't remember the size). Then I cut and pieced the nine-patch squares using the idea of the "crazy nine-patch" (google produces many many results) but with my cuts not on an angle. I spent way more time than was probably necessary trying to ensure that no row had two of the same square but now that I look at the picture above I can see that I missed a pair. d'oh.

baby quilt 7

Sashing was from a white cotton sheet (from Ikea: cheap sheet, soft cotton); backing & binding were from a stash of girlie fabrics I acquired for cheap a few years ago. They all washed up really soft and cuddly.

baby quilt 6

I'm not one for "girlie" colors but I love this little quilt. It washed up nice and crinkly and soft. It was a big hit with Wen Shu and her husband.

But... the real crowd pleasers were to come:

Cloth shoes
Pattern: Cloth Shoe Pattern from Stardust Shoes. (look around her blog while you're there. Fun tutorials!) The pattern was straight forward and I love the finished shoes. I need to work on my patience for small project sewing however. Clumsiness and small pieces: not a great combo.

When I finished these I sent a pic to my friend out in BC with the subject: "The Most Ridiculously Cute Baby Shoes Ever".

But then I made the next ones and was to revise that title:

saartje booties pair 1
(all together now: awwwwwwwww!!!!)
Pattern: Saartje's Bootees (link to pdf)
Yarn: Sock weight leftovers from various projects.
Mods: I stitched the strap ends to the shoe rather than have buttons and button loops.

I know people don't like the seaming on this one but I found the seaming to be really quick (it's a tiny shoe). I love the finished result. So much so that I made another pair:

Saartje booties pair 2

They won't fit baby for very long I'm sure but they sure are adorable.

Today is Wen Shu's last day at work before maternity leave. She and I work very closely and I will really miss her. We have gotten to be work-sisters and she is a very dear friend. I can't wait to meet her new little one though!